📣 Before we begin please make sure you have installed WPForms Lite or Pro and have an understanding of Klaviyo profiles and Klaviyo Public and Private API keys.
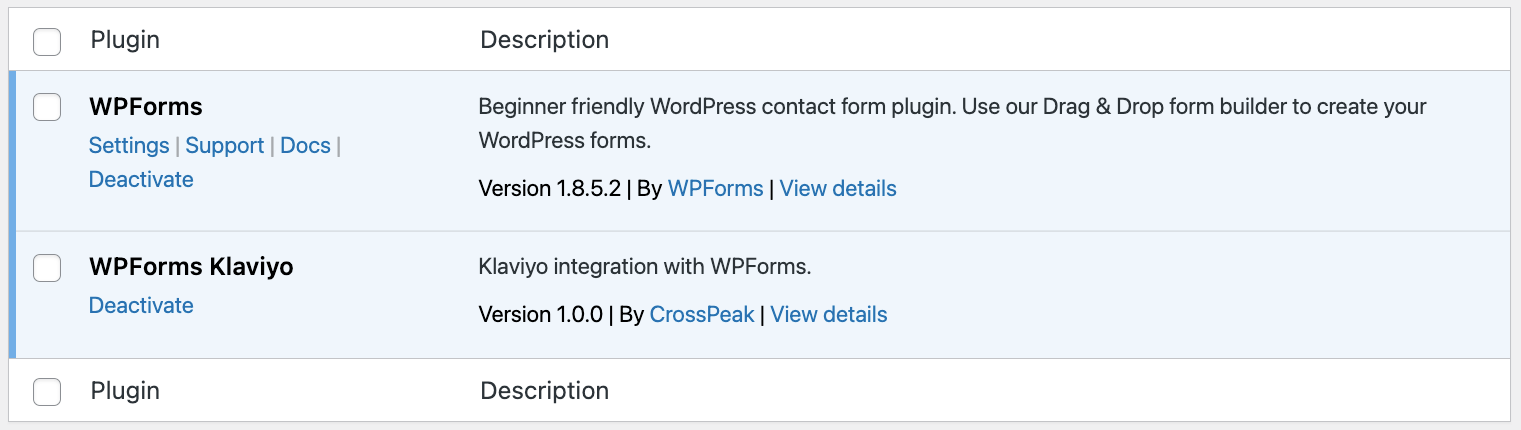
Download the WPForms Klaviyo plugin from my account, install and activate. Here’s what it should look like once activated.
Now it’s time to Activate the License.
With the license activated, to get started using WPForms Klaviyo plugin, we will go over how to set up a connection and map your WPForms to Klaviyo. This will enable you to collect email signups directly through your site’s forms.
Setup a connection between your WPForms and Klaviyo to create customer profiles and subscribe them to a list.
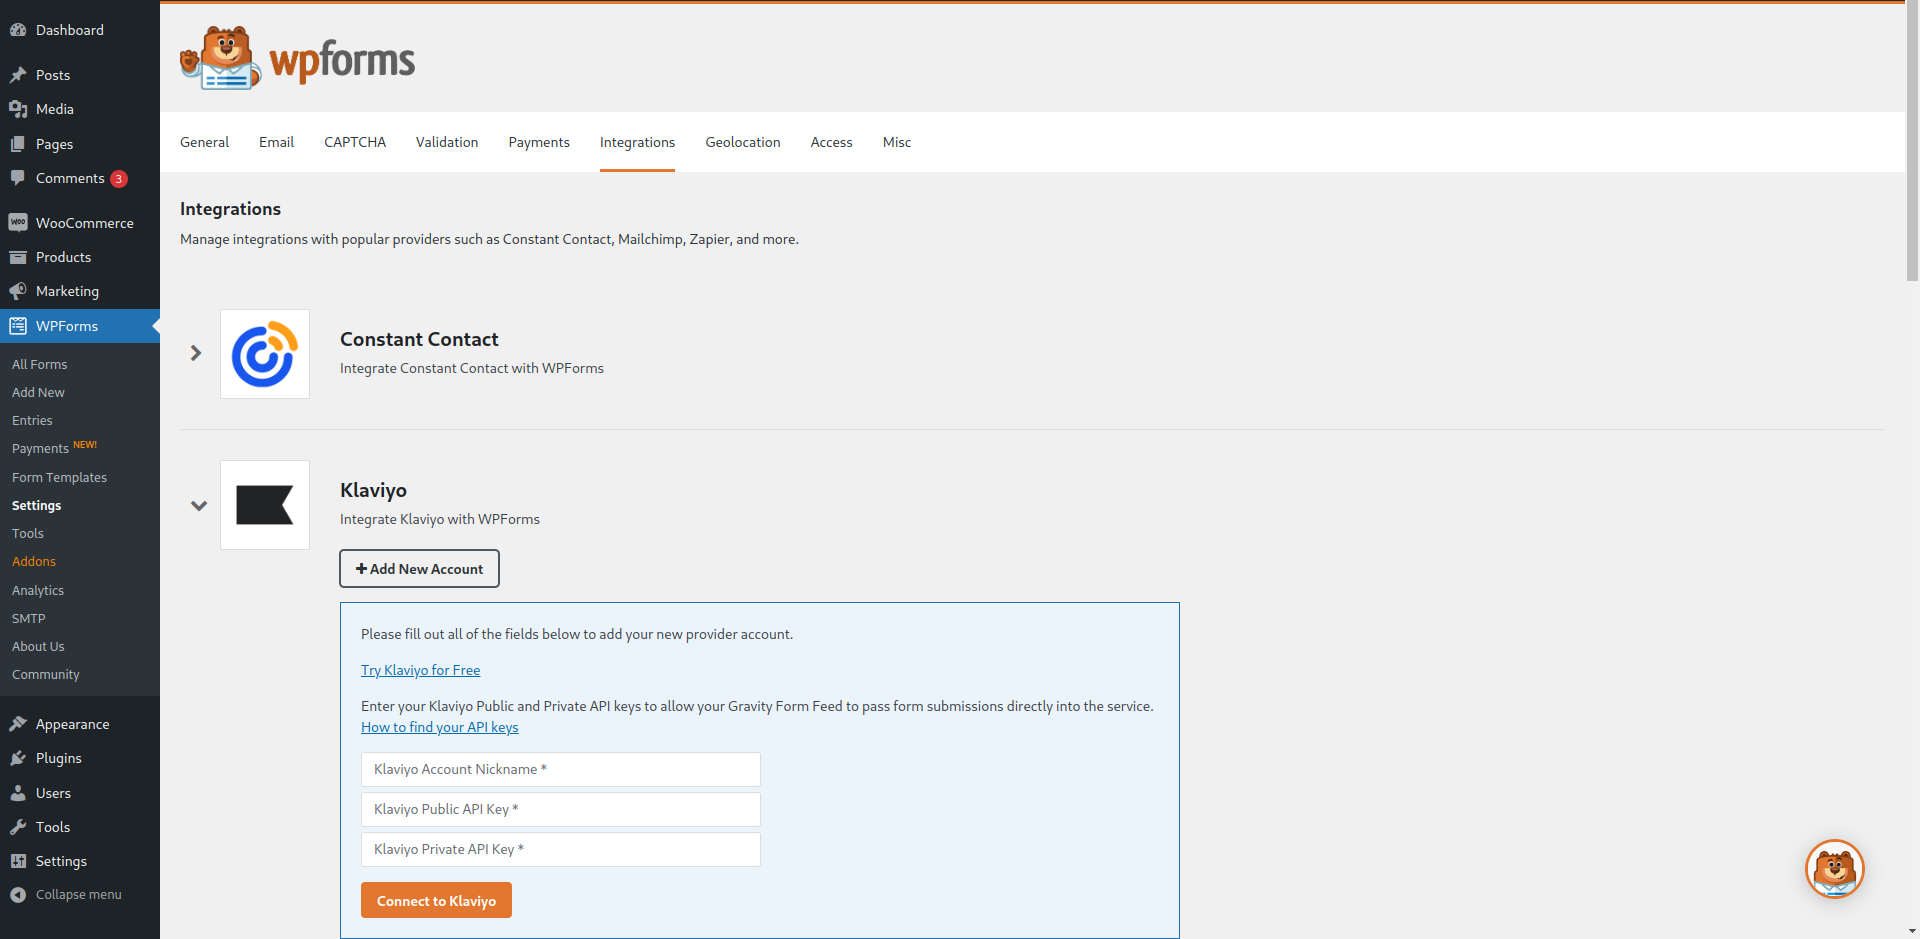
- Set up the WPForms integration connection
Go to WPForms > Settings > Integrations and click on the Klaviyo service. This will open up and display a “+ Add New Account” button. Once you click this it will ask for a Nickname for the connection along with your Klaviyo Public and Private API keys.
- Set up or create your signup form
Select or create the WPForm you would like to connect with your Klaviyo account to collect subscription signups. You must collect an email, but it is also suggested to collect a first and last name and phone number. Additional fields can also be added to collect and map information to a Klaviyo profile.
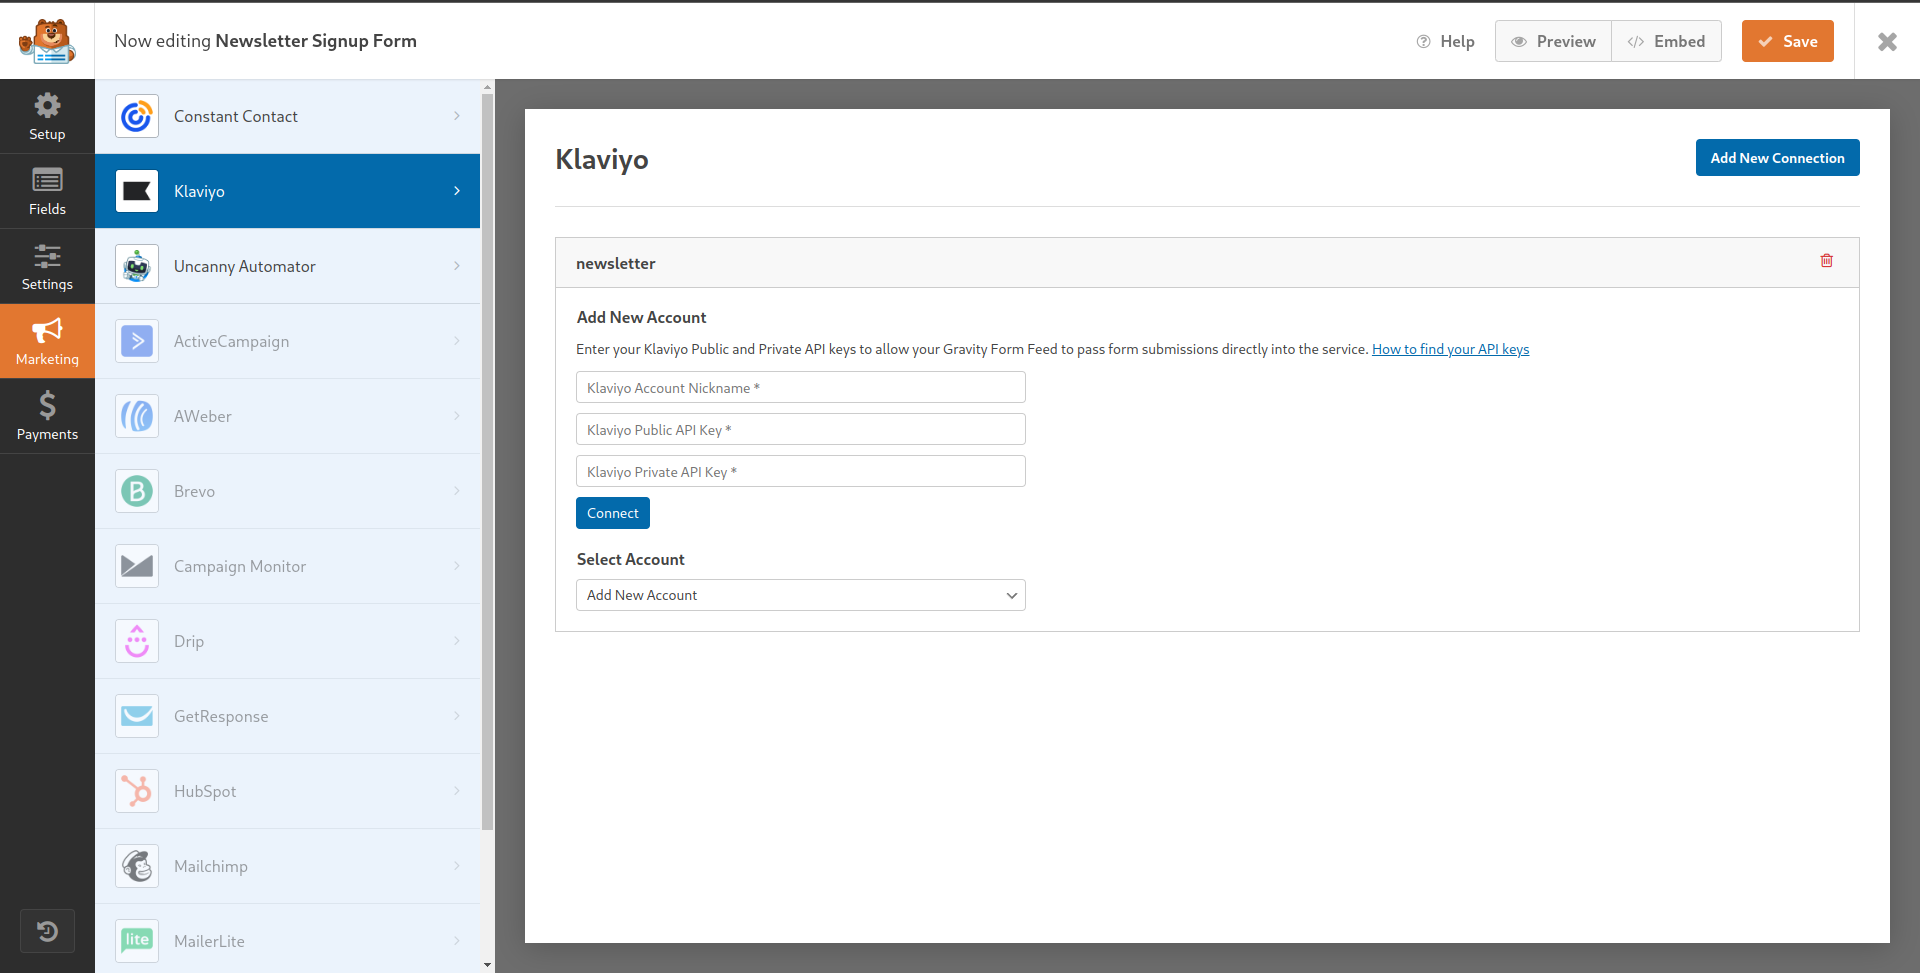
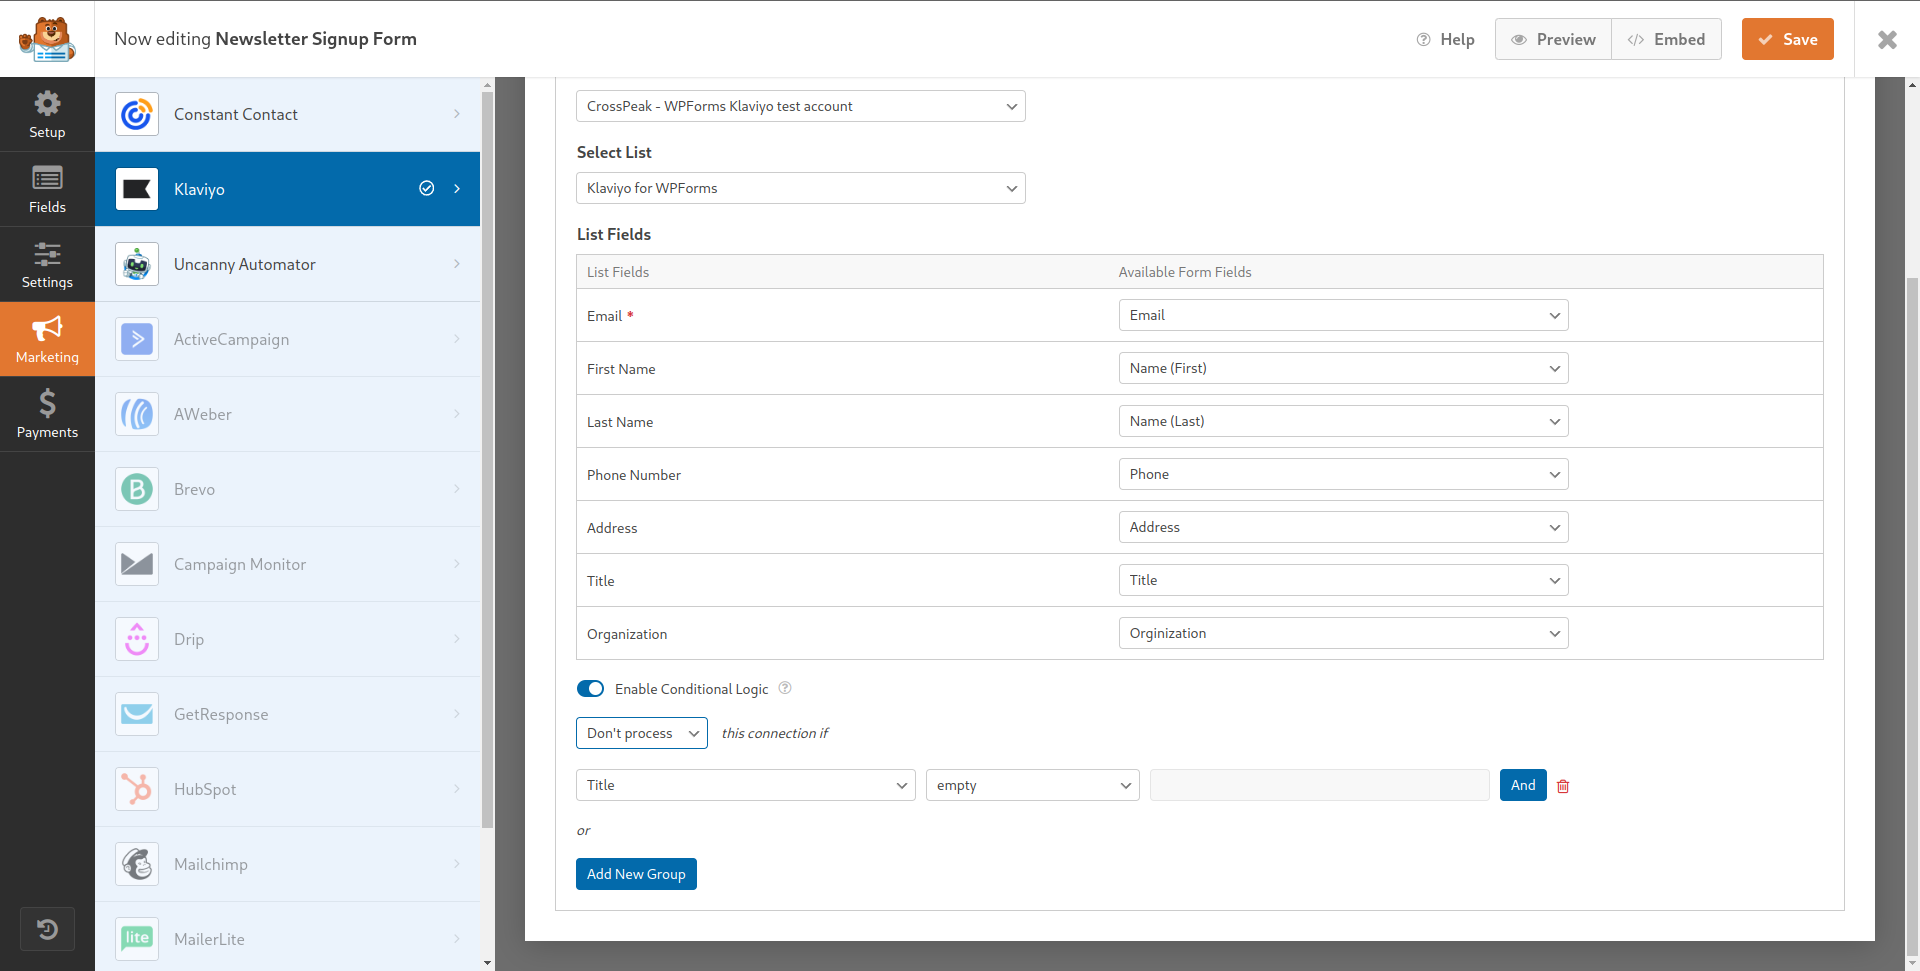
- Create a Klaviyo marketing connection for your form
Go to your form Marketing and click on Klaviyo. Click the “Add New Connection” button to create a new Klaviyo connection or select an existing connection from the dropdown.
- Map the required and basic profile fields
Map the required email field on your form to correspond with the Klaviyo email field. Map any of the additional first and last name or phone number fields your form might include.
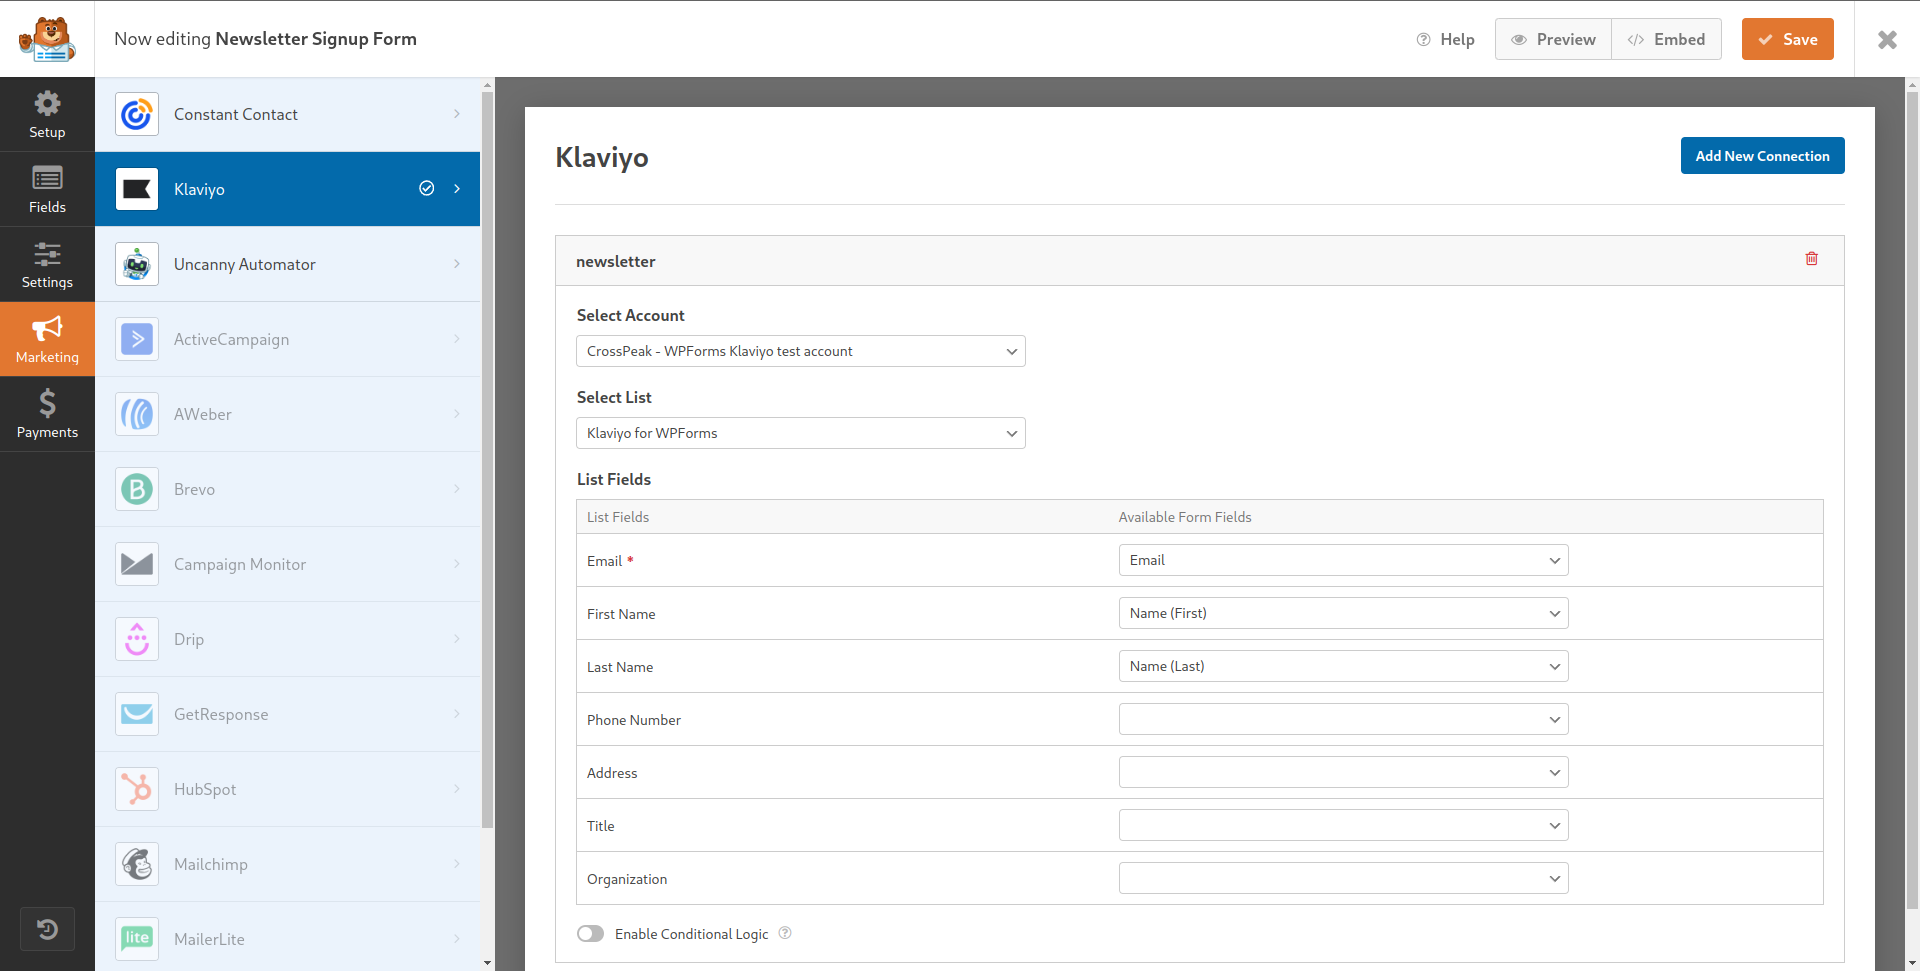
- Map location profile fields (optional)
Apart from Klaviyo’s required and basic profile fields, you can also set location information for the profile. A profile’s location and timezone are used when sending campaign emails based on recipients’ timezones, creating location-based segments, or adding location/timezone-specific filters to flows.

- Add conditional logic (optional)
You can also set up WPForms conditional logic to help you manage signup submissions. Conditional logic can be used to specify when a certain feed should process based on the form data and by extension if the submission is sent to Klaviyo.
- Save and test your settings
Once you have completed the steps above make sure to save and test your settings. You should be able to complete a submission through the form and review all the basic, location and custom properties you have mapped in the feed within the Klaviyo profile.
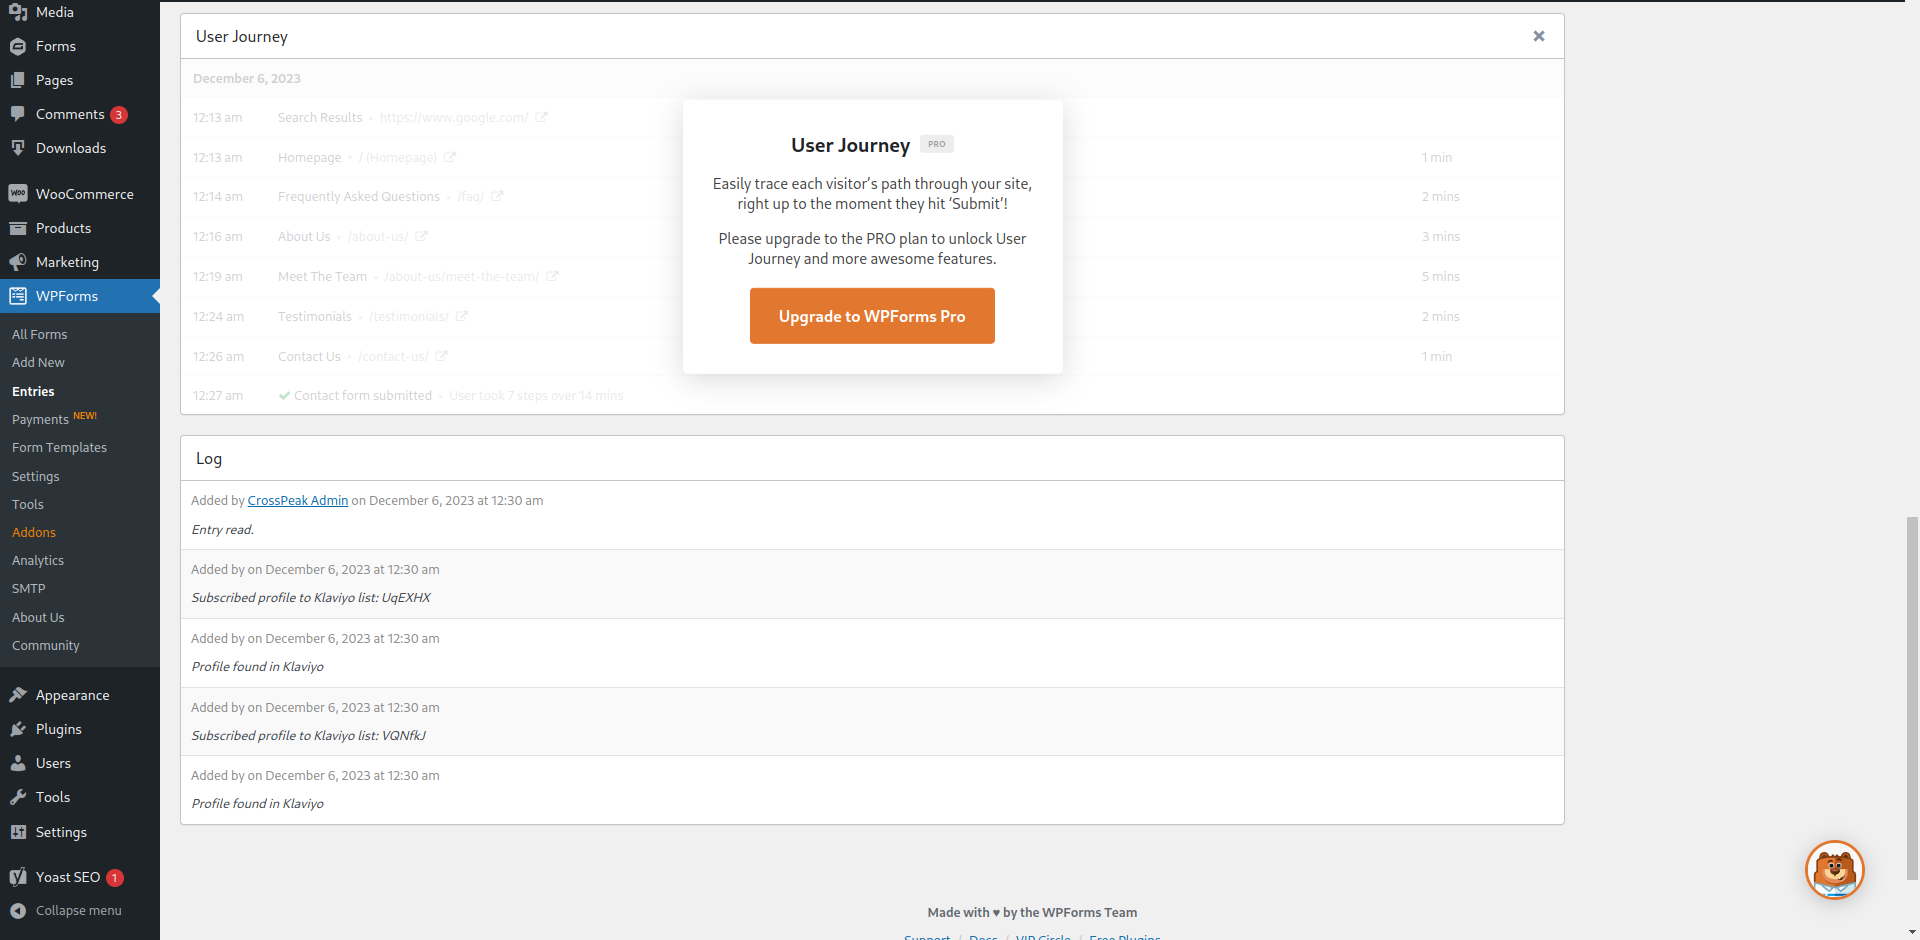
When you have completed the steps above you should be able to see the form entries and mapped field appear in your Klaviyo list and profiles.
Questions & Support
Still have a question? Review our other documentation for the WPForms for Klaviyo plugin, or reach out with additional questions or feature requests.