📣 Make sure you have Gravity Forms installed and enabled before beginning.
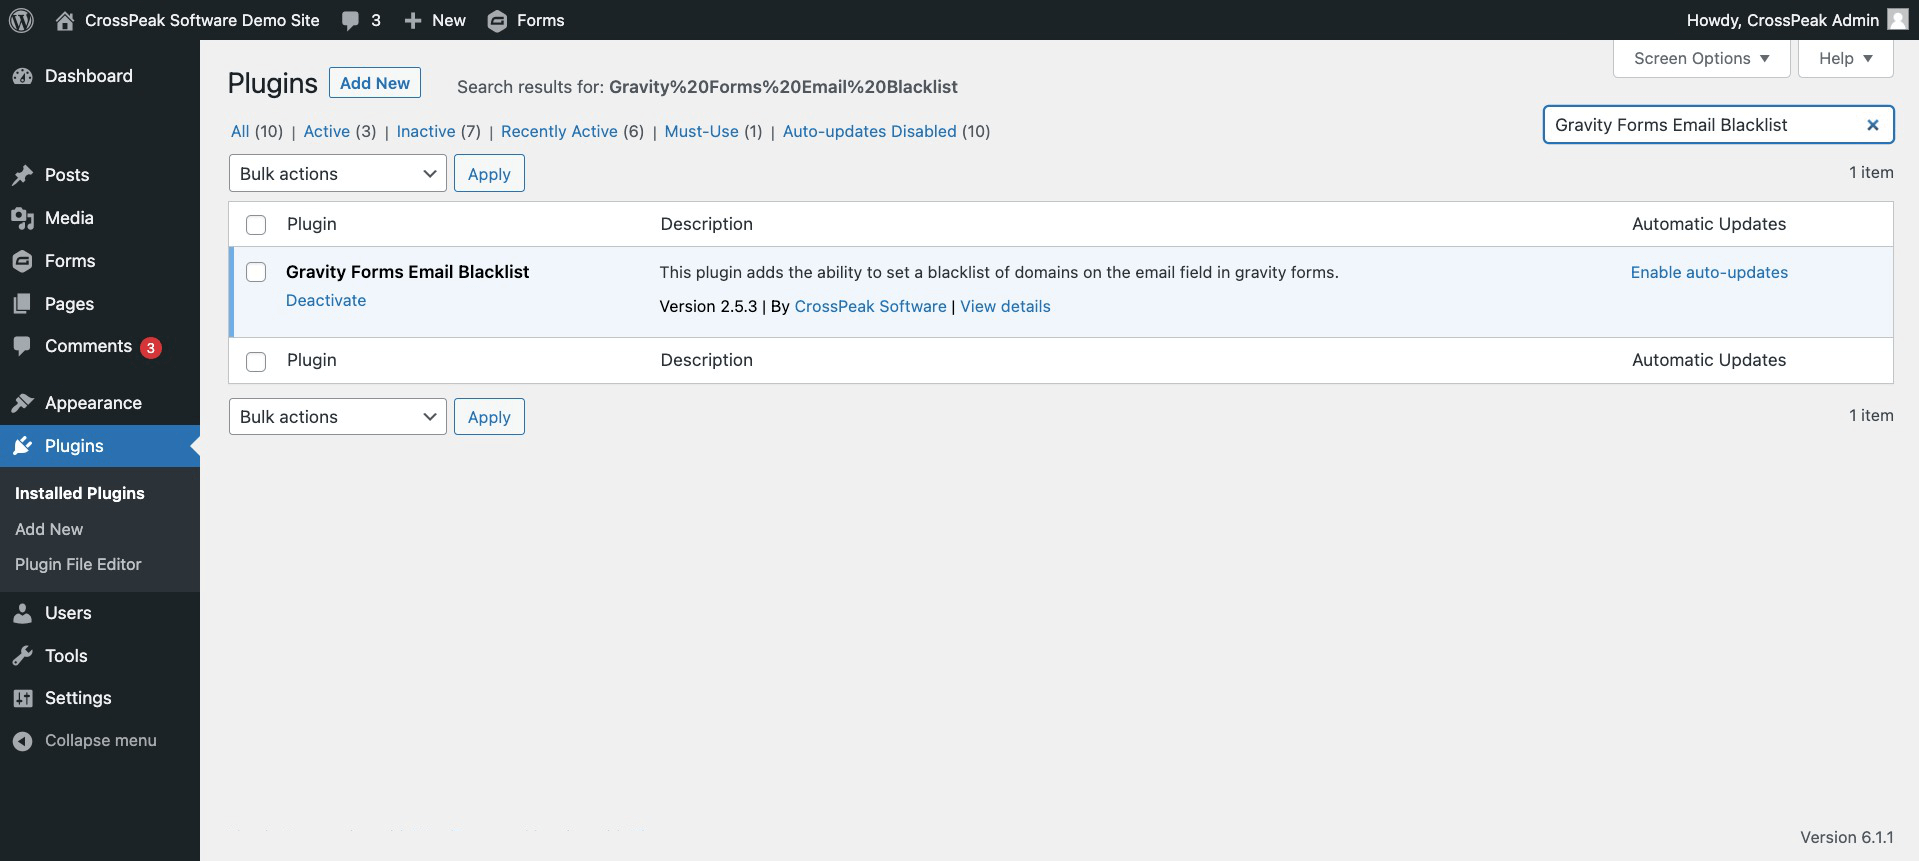
Installation
Download the Gravity Forms Encryption plugin from my account, install and activate. It should look like this:
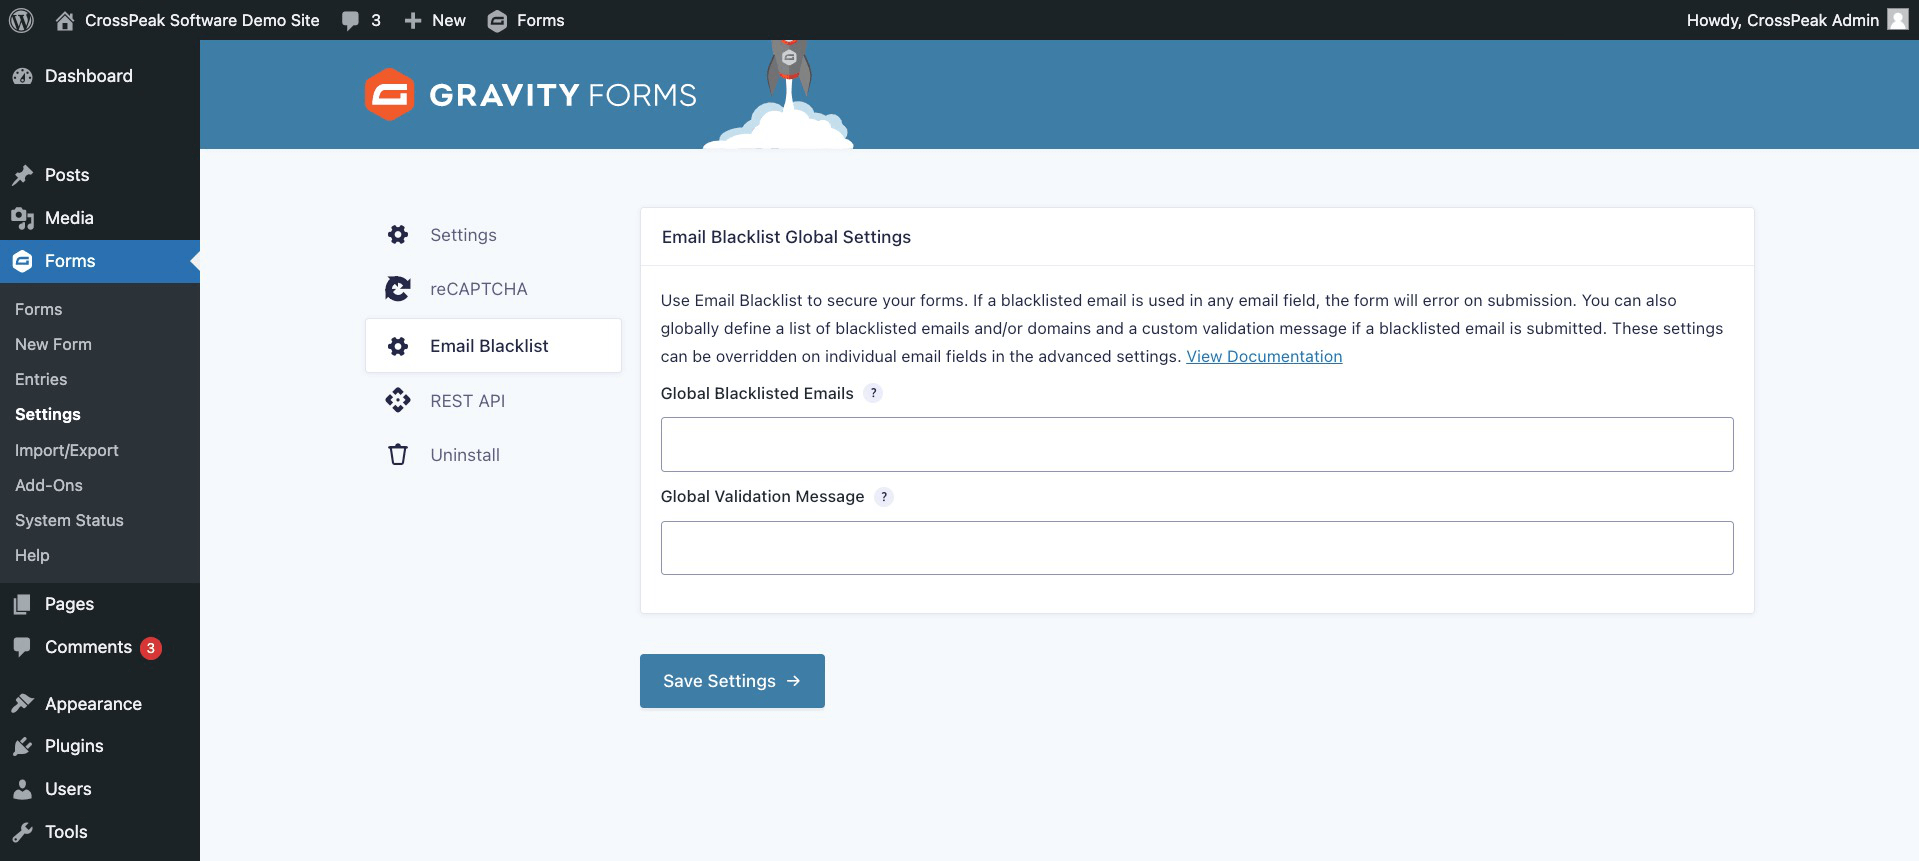
Global Settings
You should then see these options in the Gravity Forms Settings sub-menu under “Email Blacklist.”
Form Settings
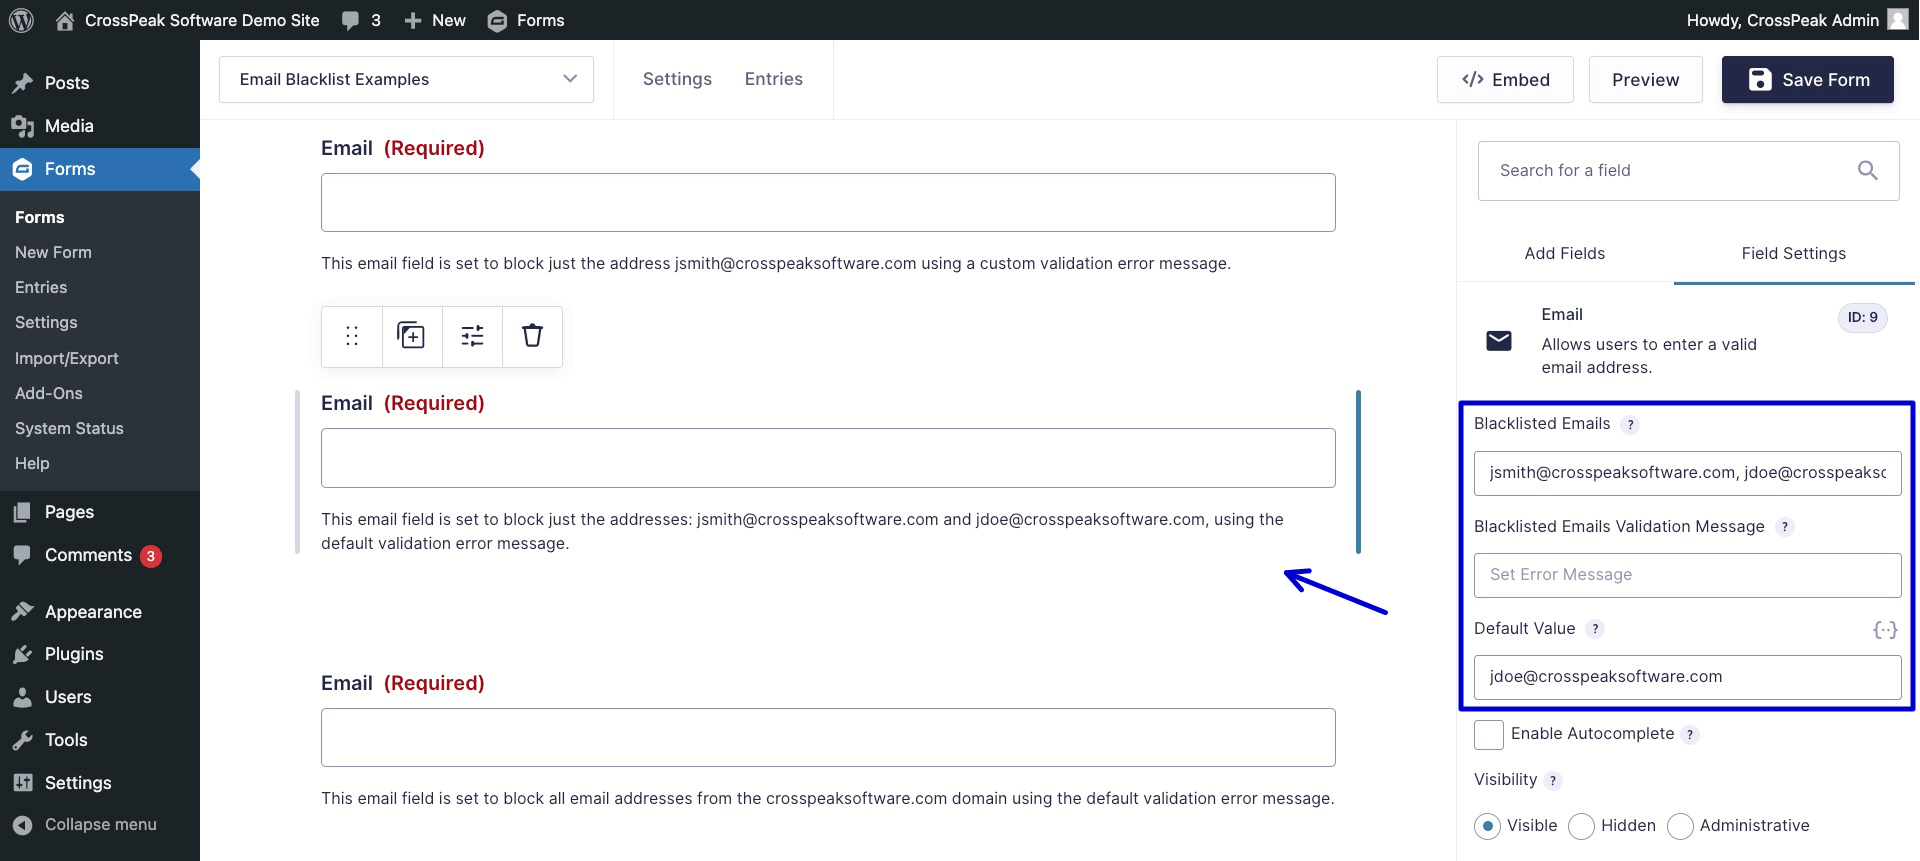
When creating a form, selecting a field and then clicking on the Advanced settings on the right will bring up options for the plugin.
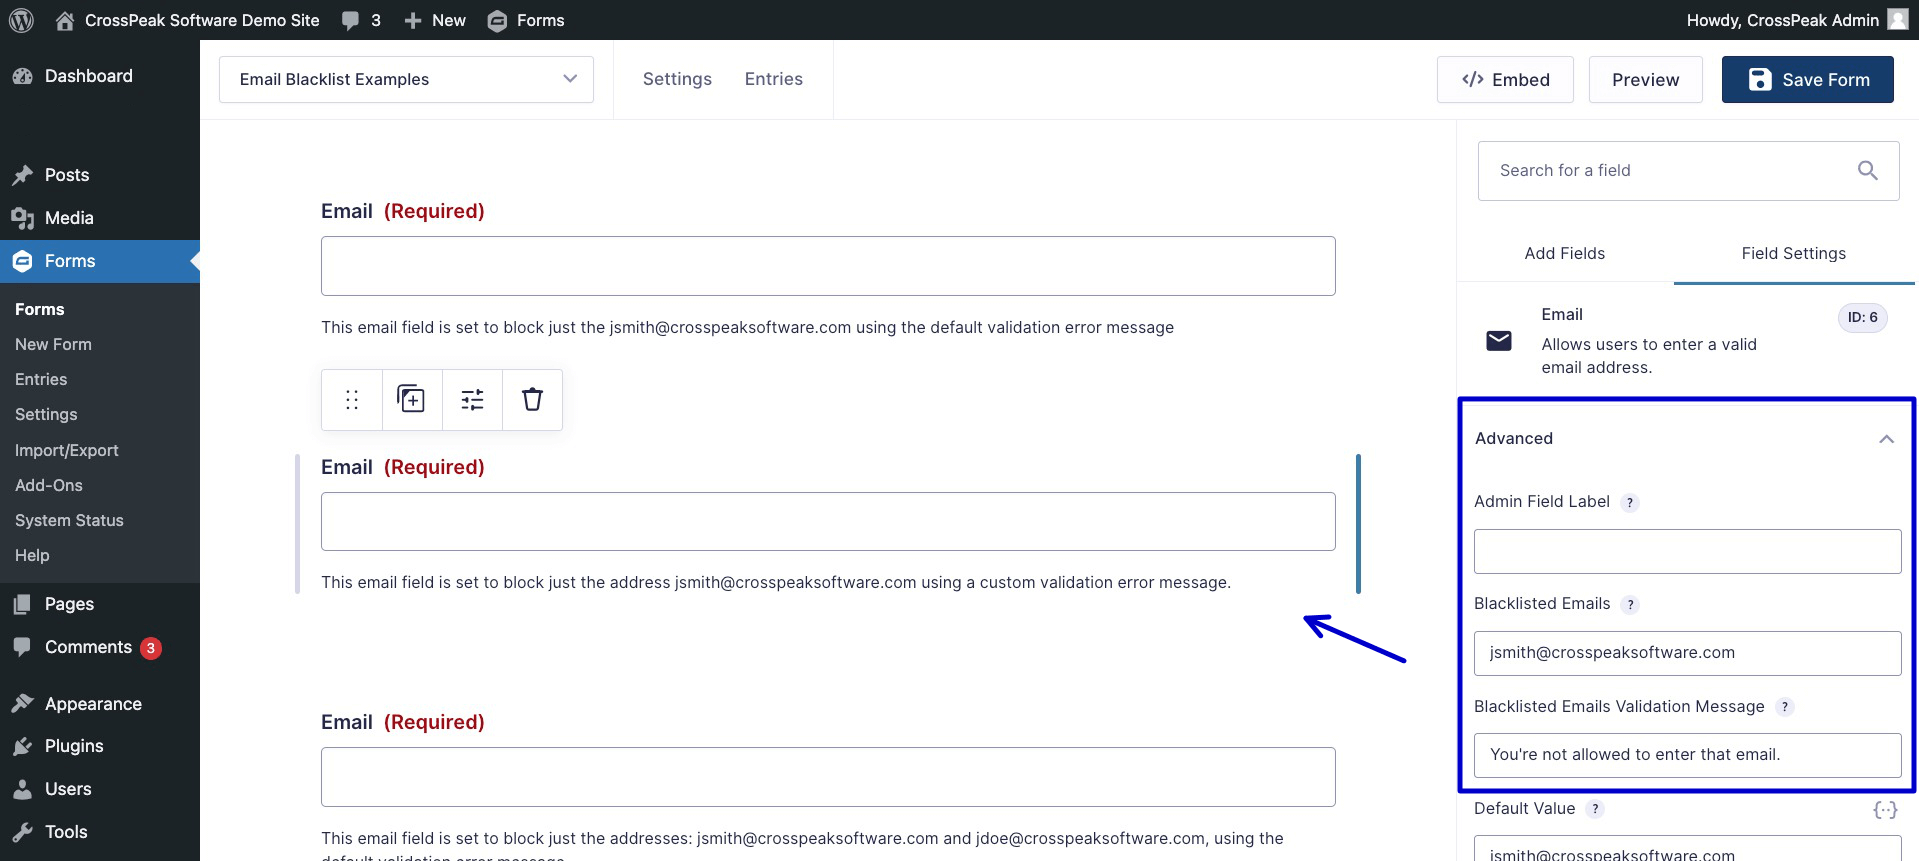
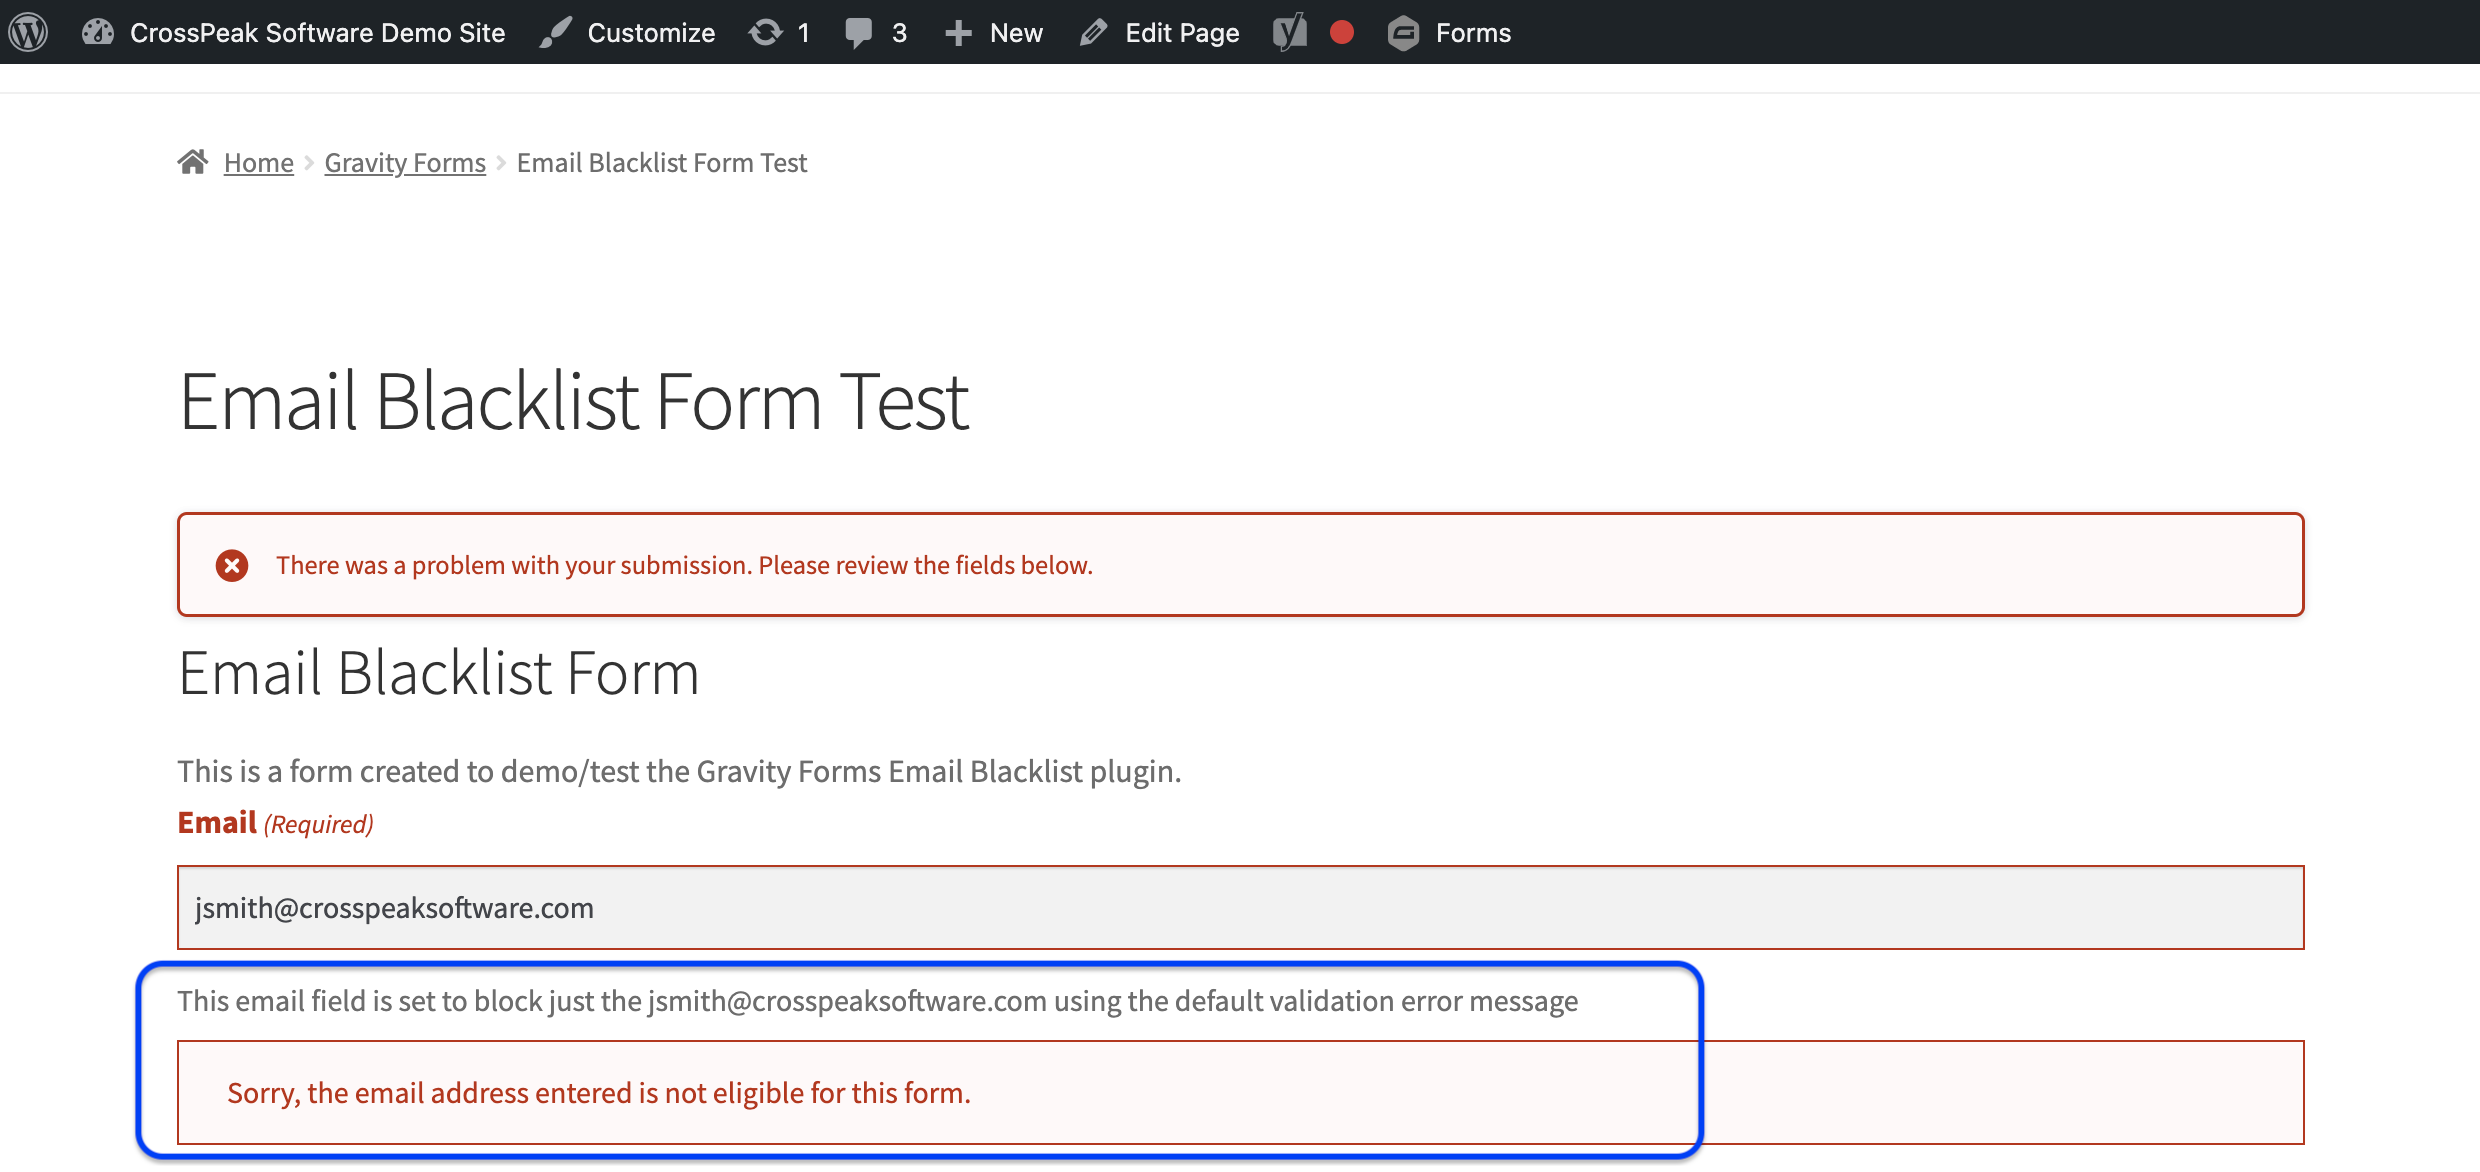
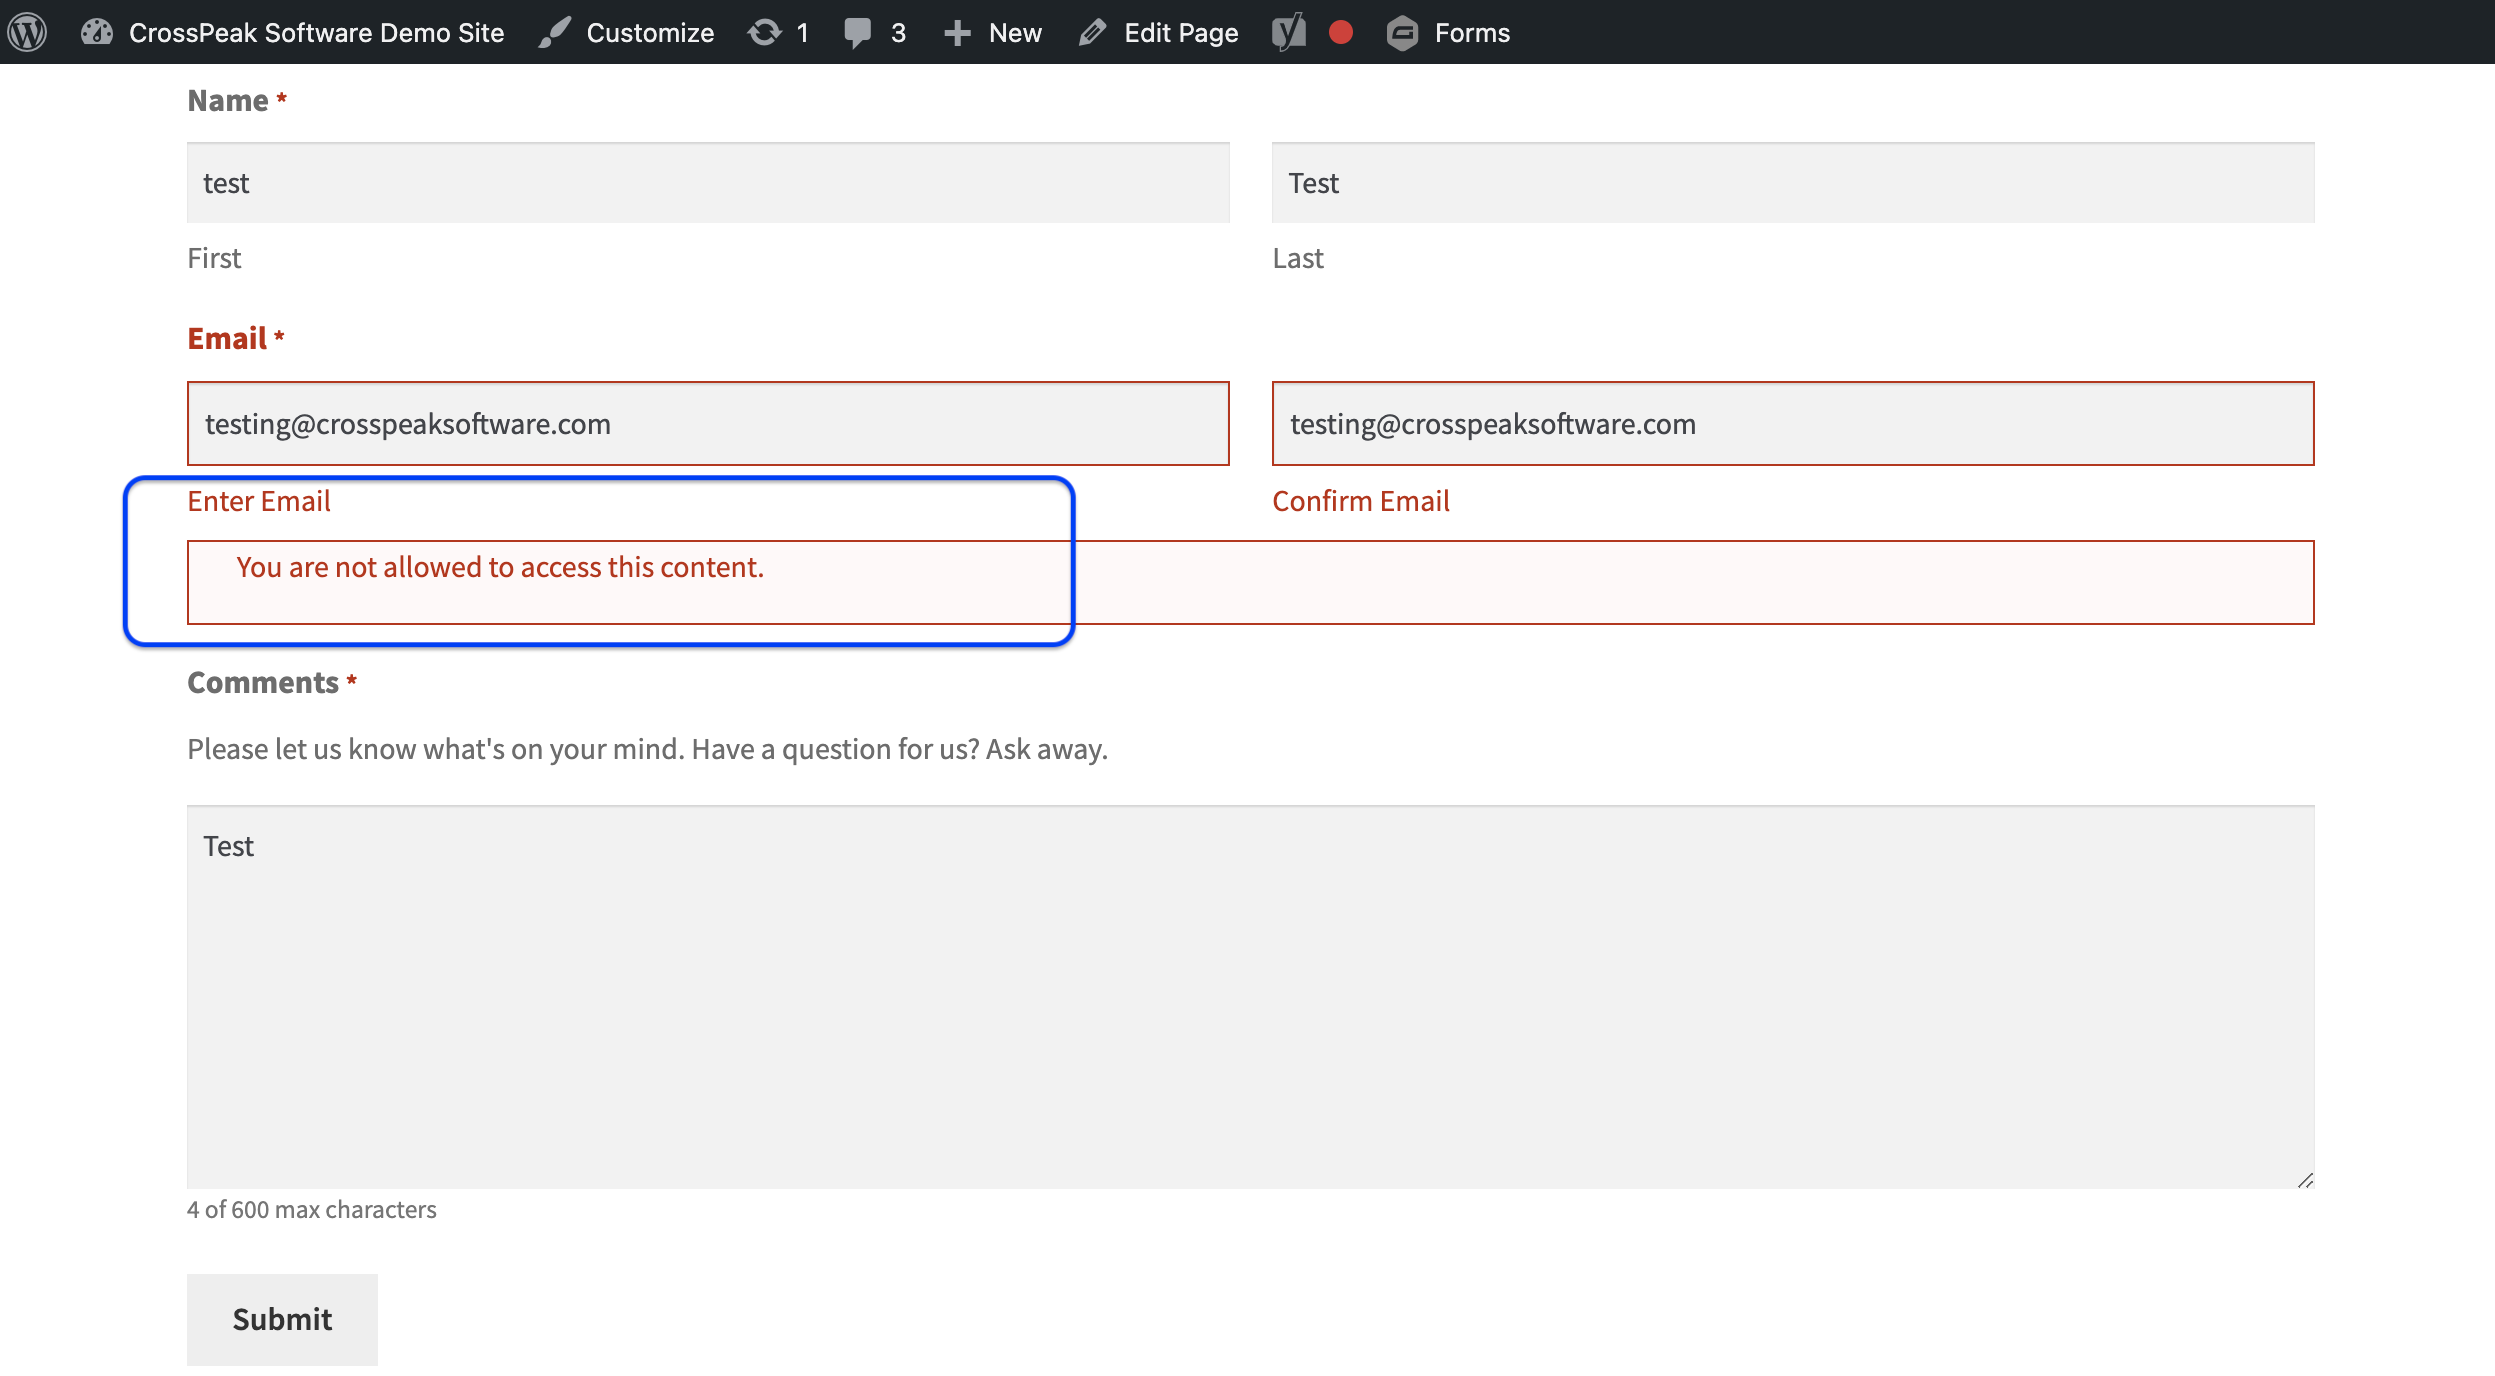
If someone enters an email address that’s been blacklisted, this default error message will appear. You can customize the message within the Advanced settings.
Here’s the output of a customized error message:
In this example, we see how to blacklist multiple addresses separated by a comma.
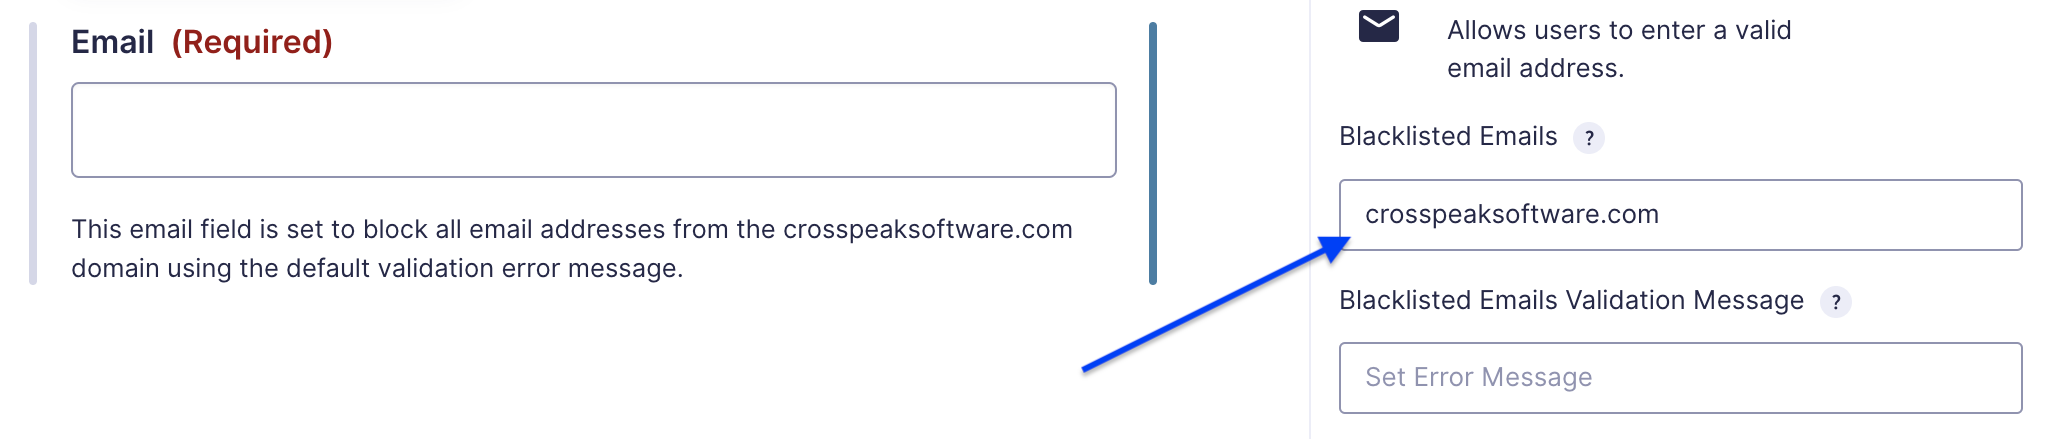
Example of blacklisting the all addresses from crosspeaksoftware.com:
Here we blacklist the entire .com TLD:

That’s it! Happy blacklisting. If you have any questions about using this plugin, feel free to contact us.