Automate your lead data with Scheduled Entry Export for Gravity Forms
Here is a step-by-step guide on how to install the plugin and set up your first export feed.
How to Install the Plugin
Before installing, ensure you have the core Gravity Forms plugin installed and activated on your WordPress site.
- Download the plugin
.zipfile. - Log in to your WordPress admin dashboard.
- Navigate to Plugins > Add New and click the Upload Plugin button at the top of the screen.
- Choose the
.zipfile you downloaded and click Install Now. - Once the installation is complete, click Activate Plugin.
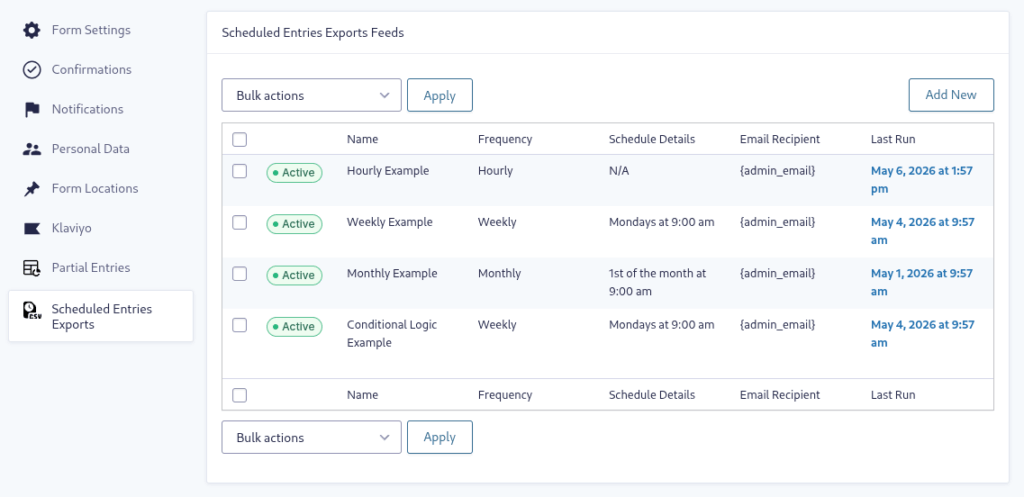
How to Set Up an Export Feed
Setting up a scheduled export feed is very similar to configuring a standard Gravity Forms notification:
- In your WordPress admin dashboard, go to Forms > Forms and hover over the specific form you want to export entries from.
- Go to Settings > Scheduled Entries Exports.
- Click the Add New button to create a new export feed.
- Fill out the configuration settings. Here is a detailed breakdown of how to use each option:
- Name: Give your feed a descriptive name (e.g., “Weekly Sales Leads”) so you can easily identify it later.
- Frequency: Choose how often the background export should run. You can select Hourly, Daily, Weekly, or Monthly.
- Delivery Time/Day: This setting dynamically updates based on your chosen Frequency to pinpoint exactly when the export occurs.
- If Daily: You will be prompted to select a Delivery Time.
- If Weekly: You can select the Delivery Day of the Week (Monday–Sunday) and the Delivery Time.
- If Monthly: You can select the Delivery Day of the Month (1st–31st, or “Last Day of the Month”) and the Delivery Time.
- (Note: The time you select is based on your WordPress Site Timezone).
- Send To Email: Enter the email address (or multiple comma-separated addresses) that should receive the CSV attachment. You can also use Gravity Forms merge tags (like
{admin_email}) to dynamically route the export. - Optional Routing: If you want the email to look like it came from a specific person or department rather than your default WordPress email, you can configure the From Name, From Email, Reply To, and BCC fields. All of these fields support merge tags.
- Optional Message: Write a custom message to be included in the body of the email. This is useful for providing context to the recipient (e.g., “Attached are the new volunteer signups for this week.”)
- Conditional Logic: Enable this setting to filter out unwanted data. By checking “Enable conditional logic,” you can set rules to specify exactly which entries are included in the CSV. For example, you can set a rule to only export entries if a “Payment Status” field is equal to “Paid”.
- Click Update Settings to save the feed and schedule your background cron job.
Questions & Support
Still have a question? Review our other documentation for the plugin, or reach out with additional questions or feature requests.