📣 Make sure you have WooCommerce installed and enabled before beginning.
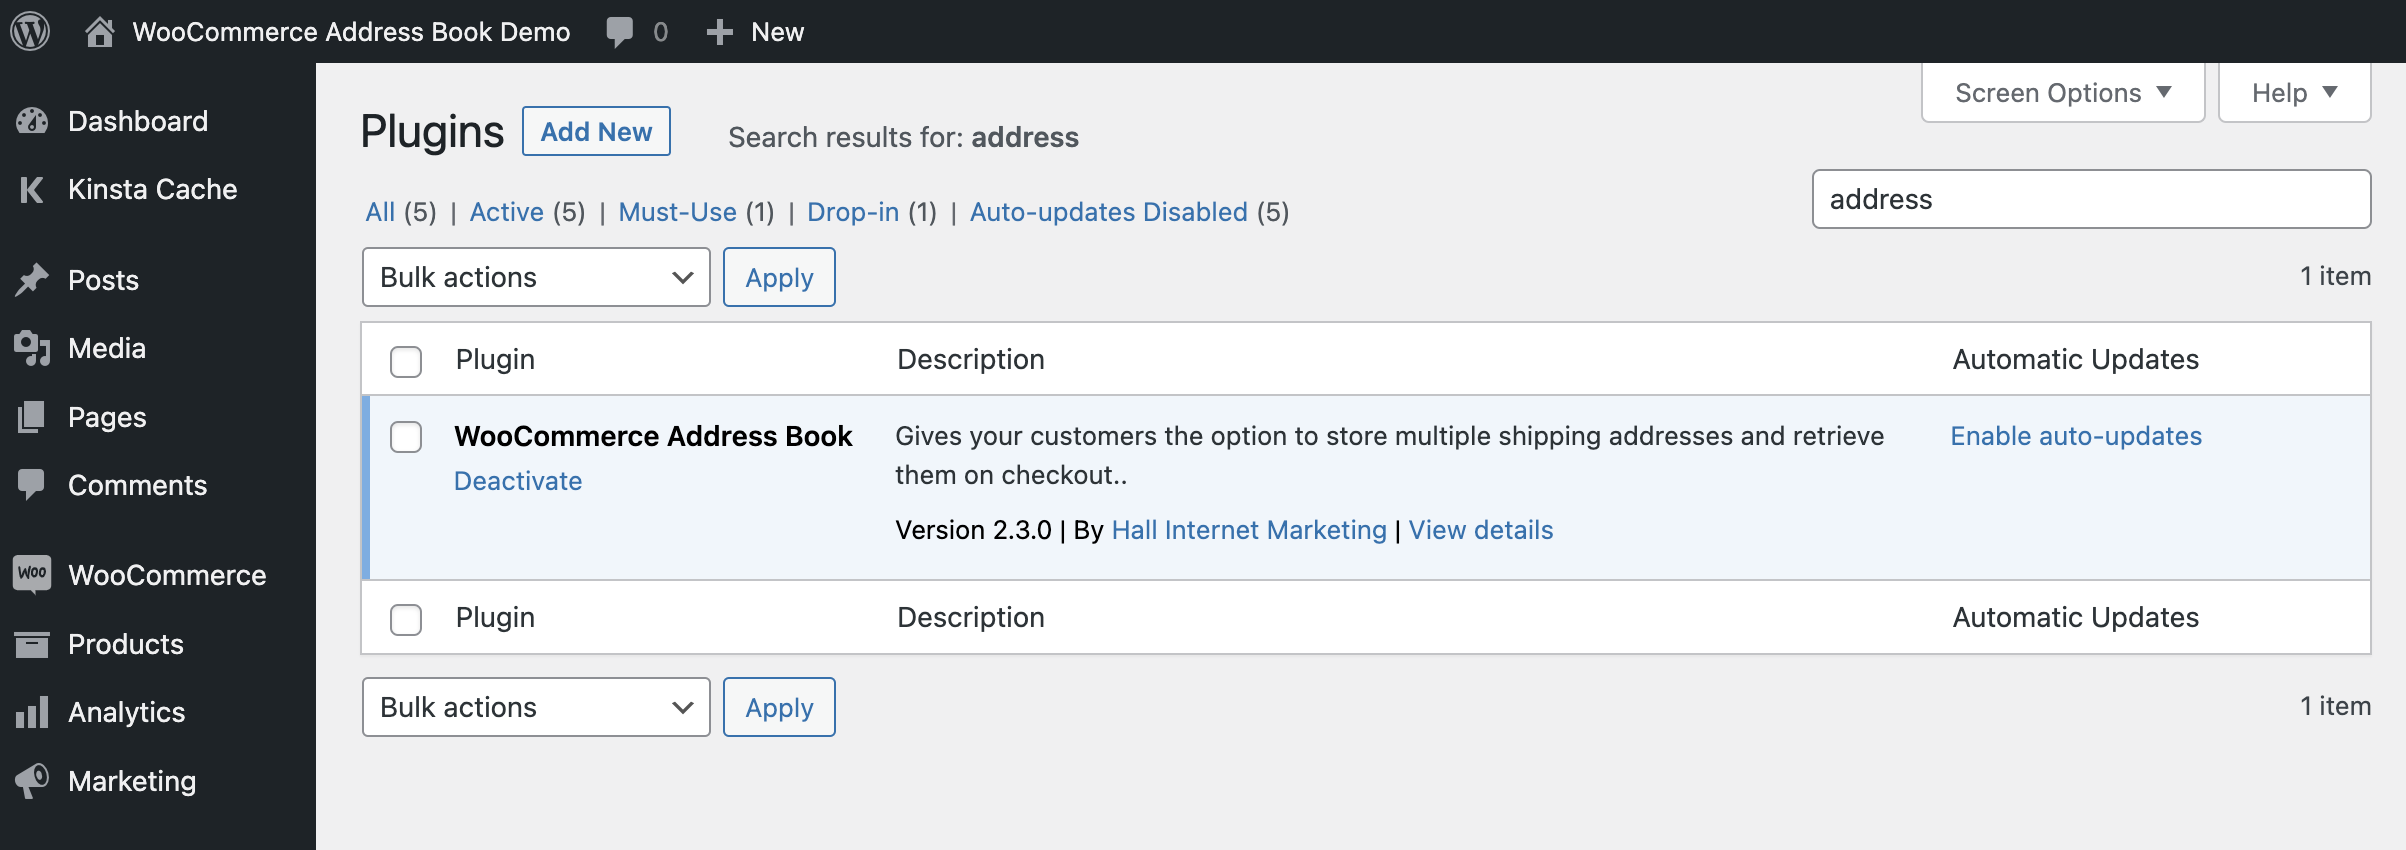
Download the WooCommerce Address Book plugin on this page, install and activate. It should look like this:
Settings
The settings for this plugin are located in WooCommerce General settings: WooCommerce -> Settings -> General.
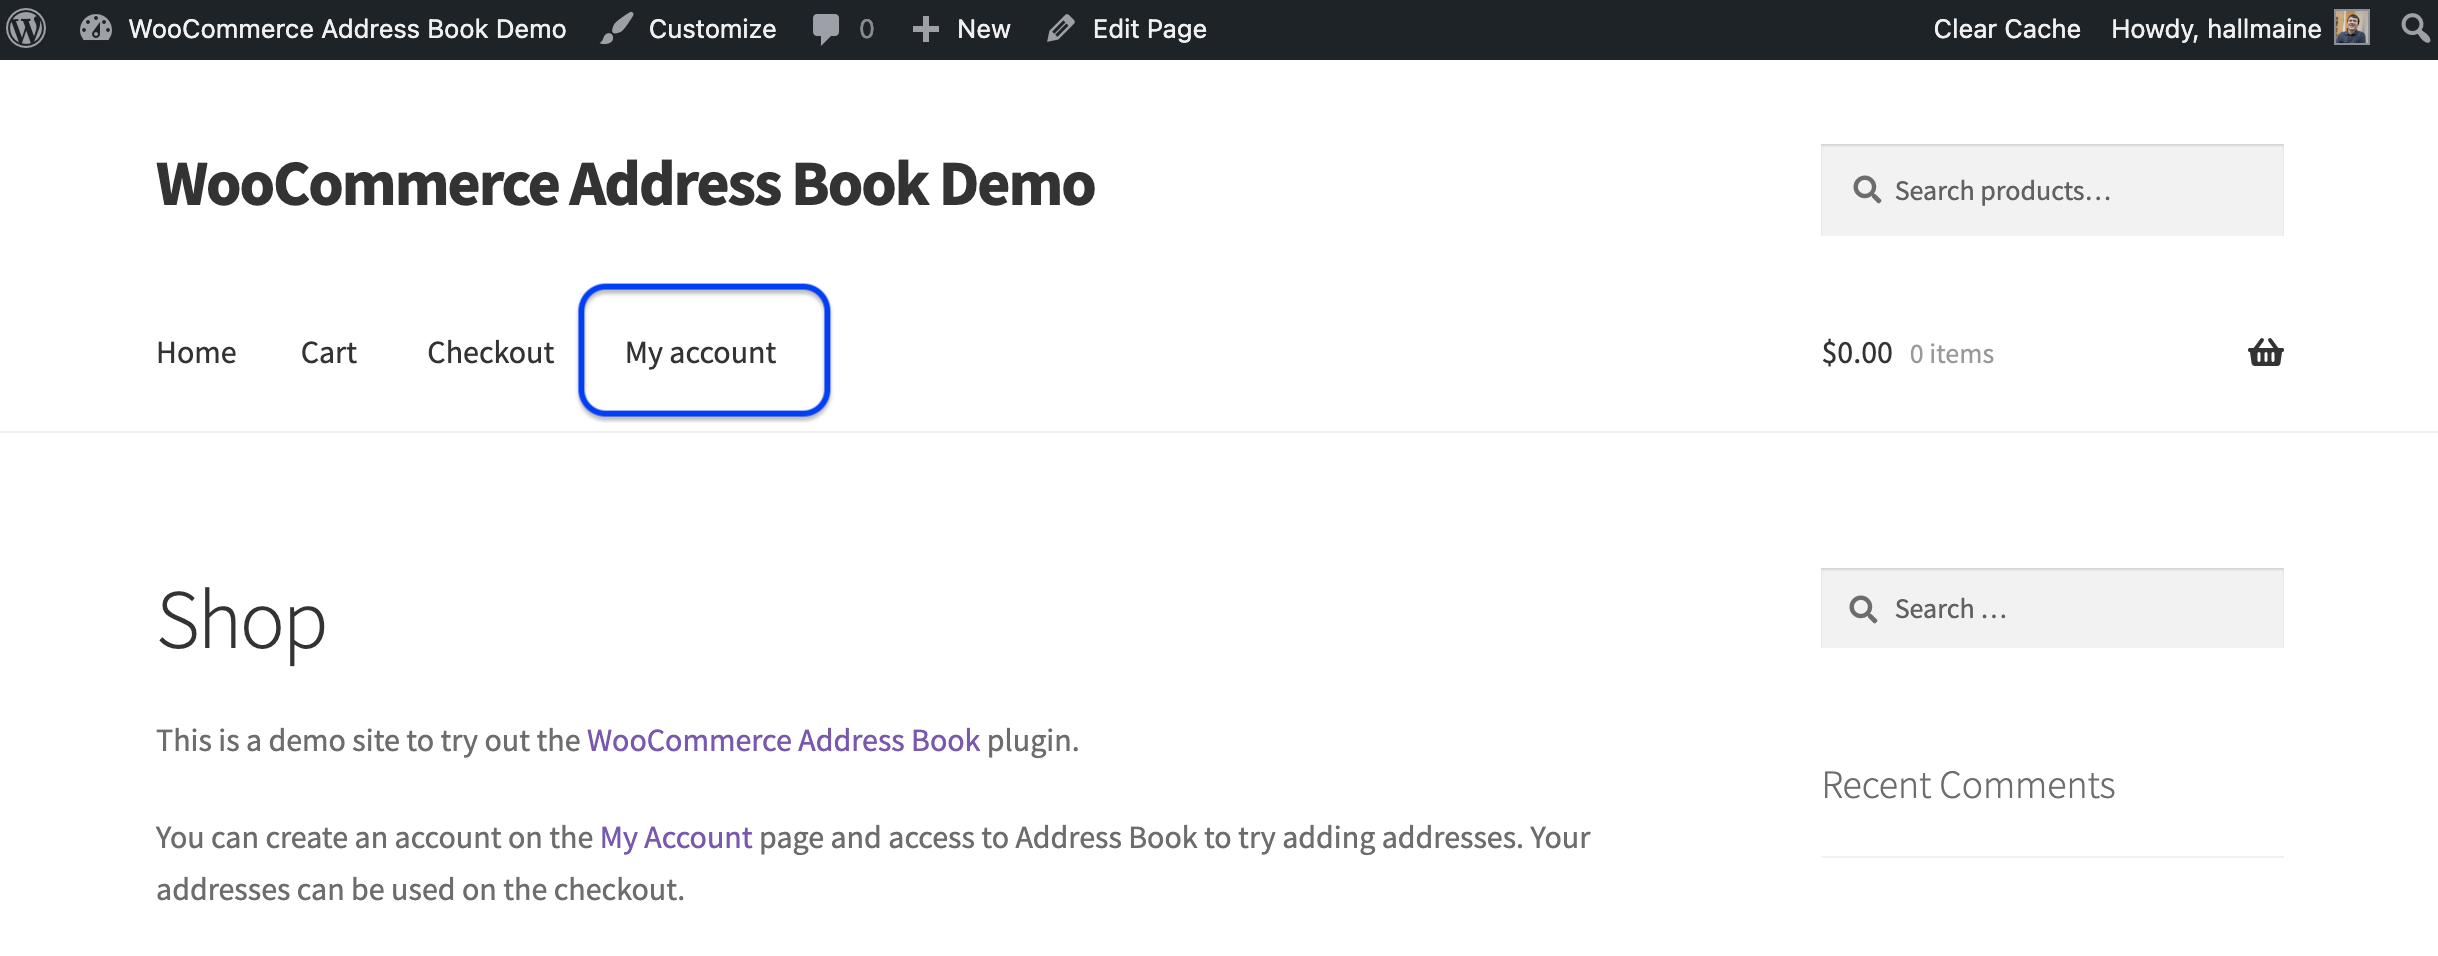
With the plugin installed and activated, users can access their Address Book first clicking the “My Account” link.
After selecting “Address Book” from the menu of the left, you’ll see your Default addresses appear. If none are created yet, the buttons to add them are below.
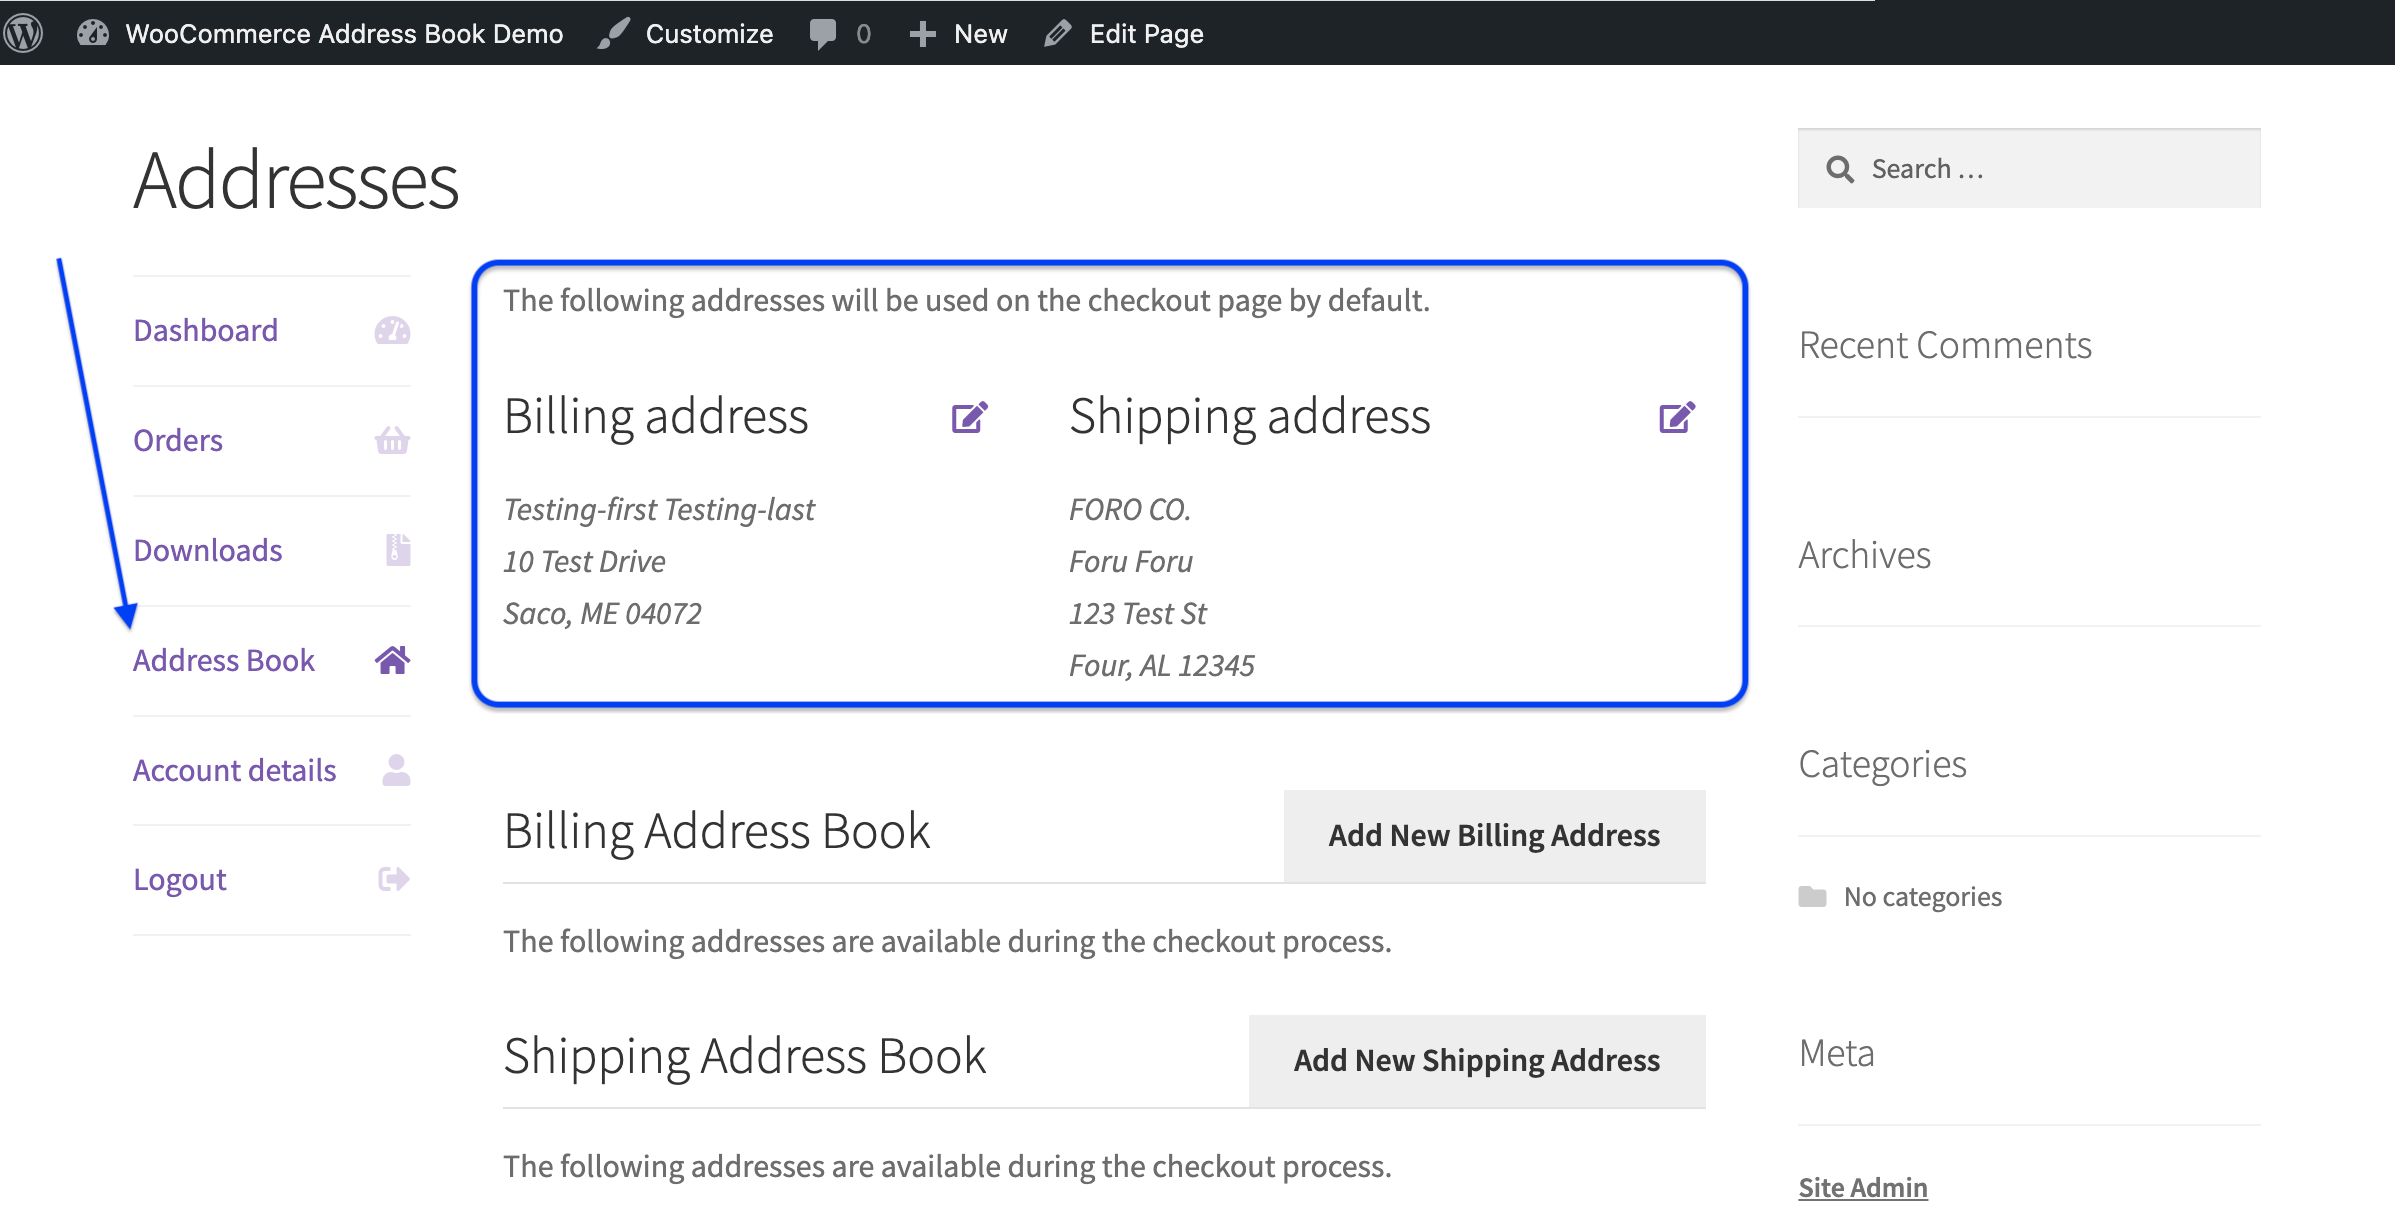
You can add multiple addresses in either the Shipping or Billing section. Make an Address the default by clicking the “Primary Address” link
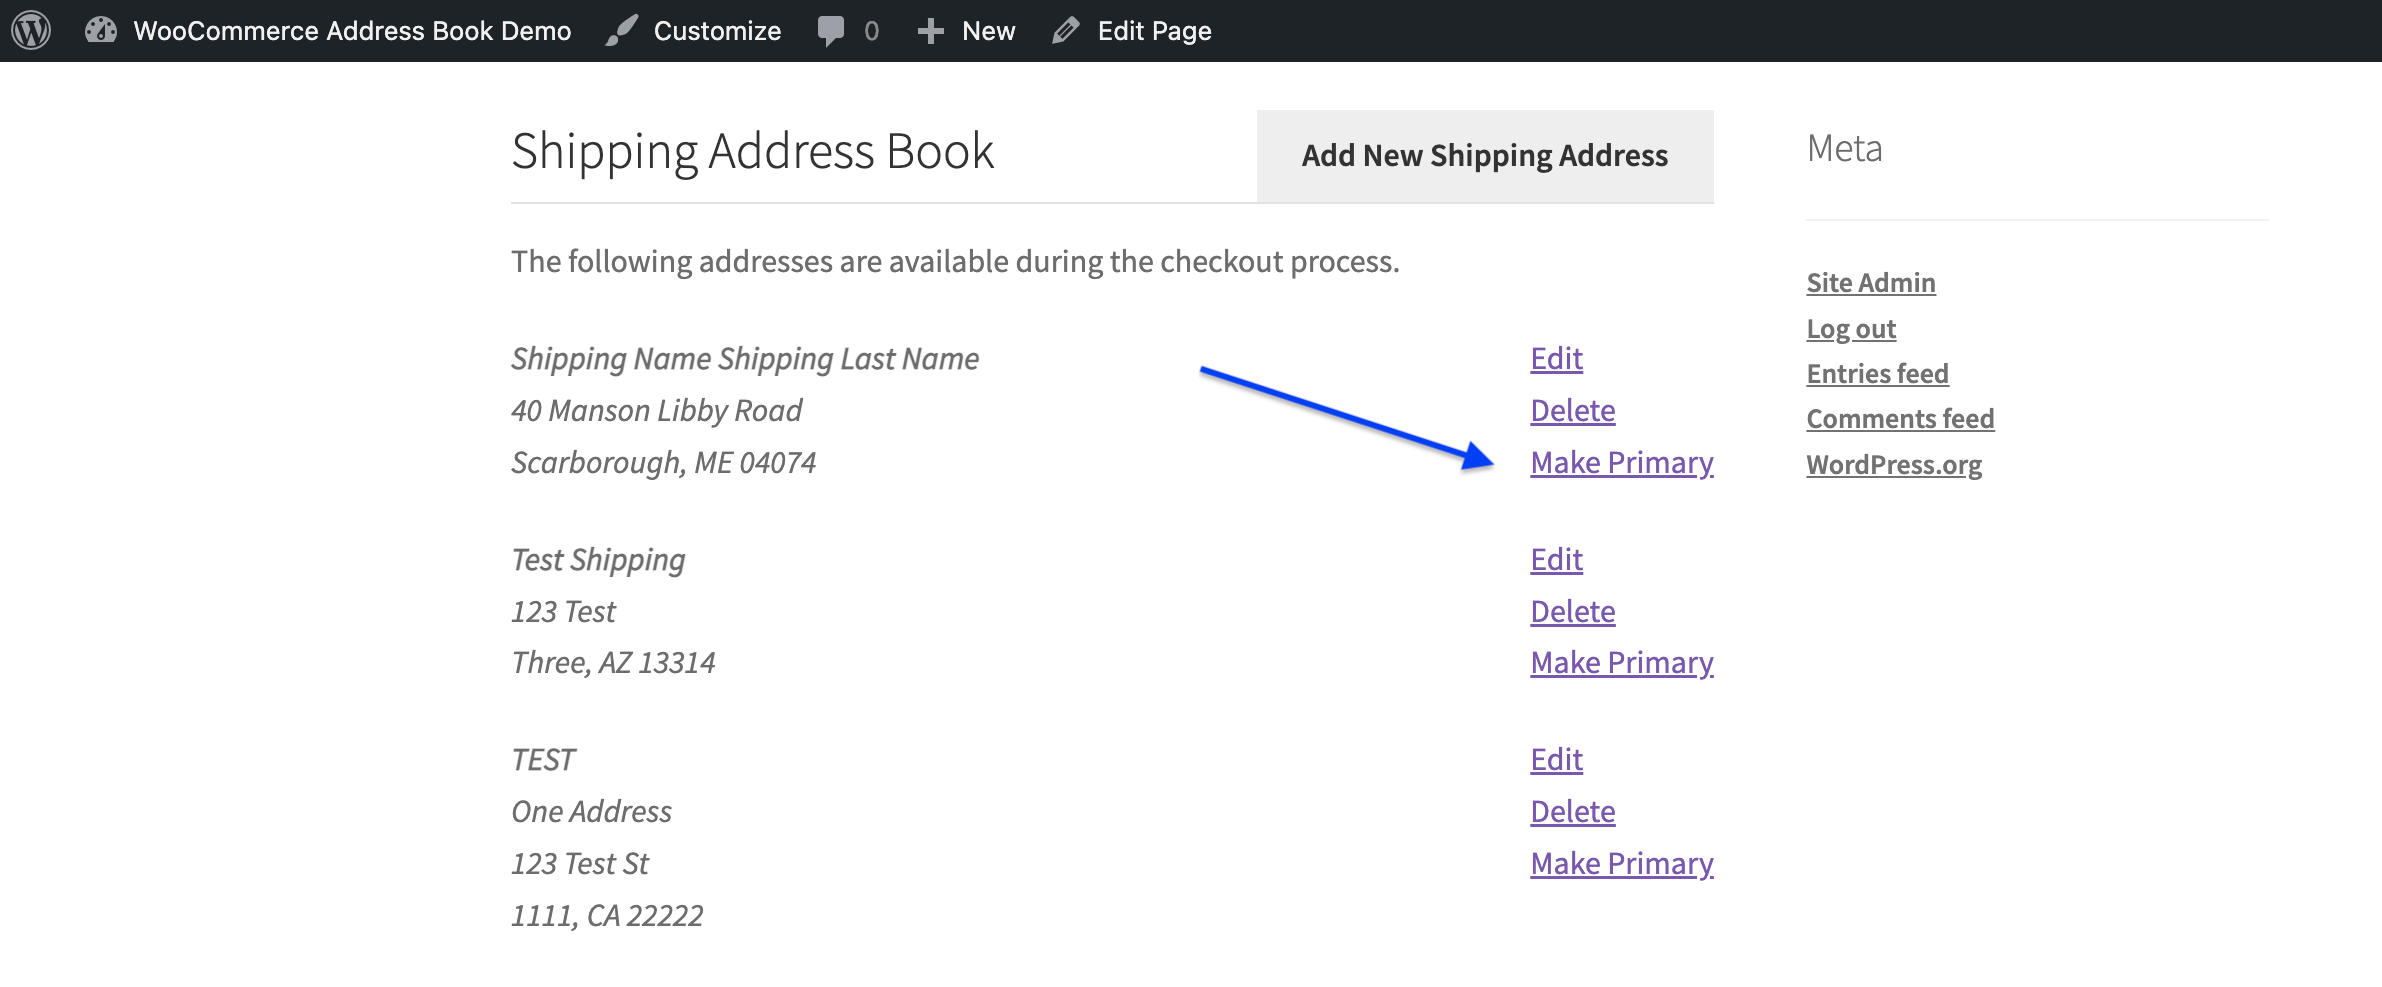
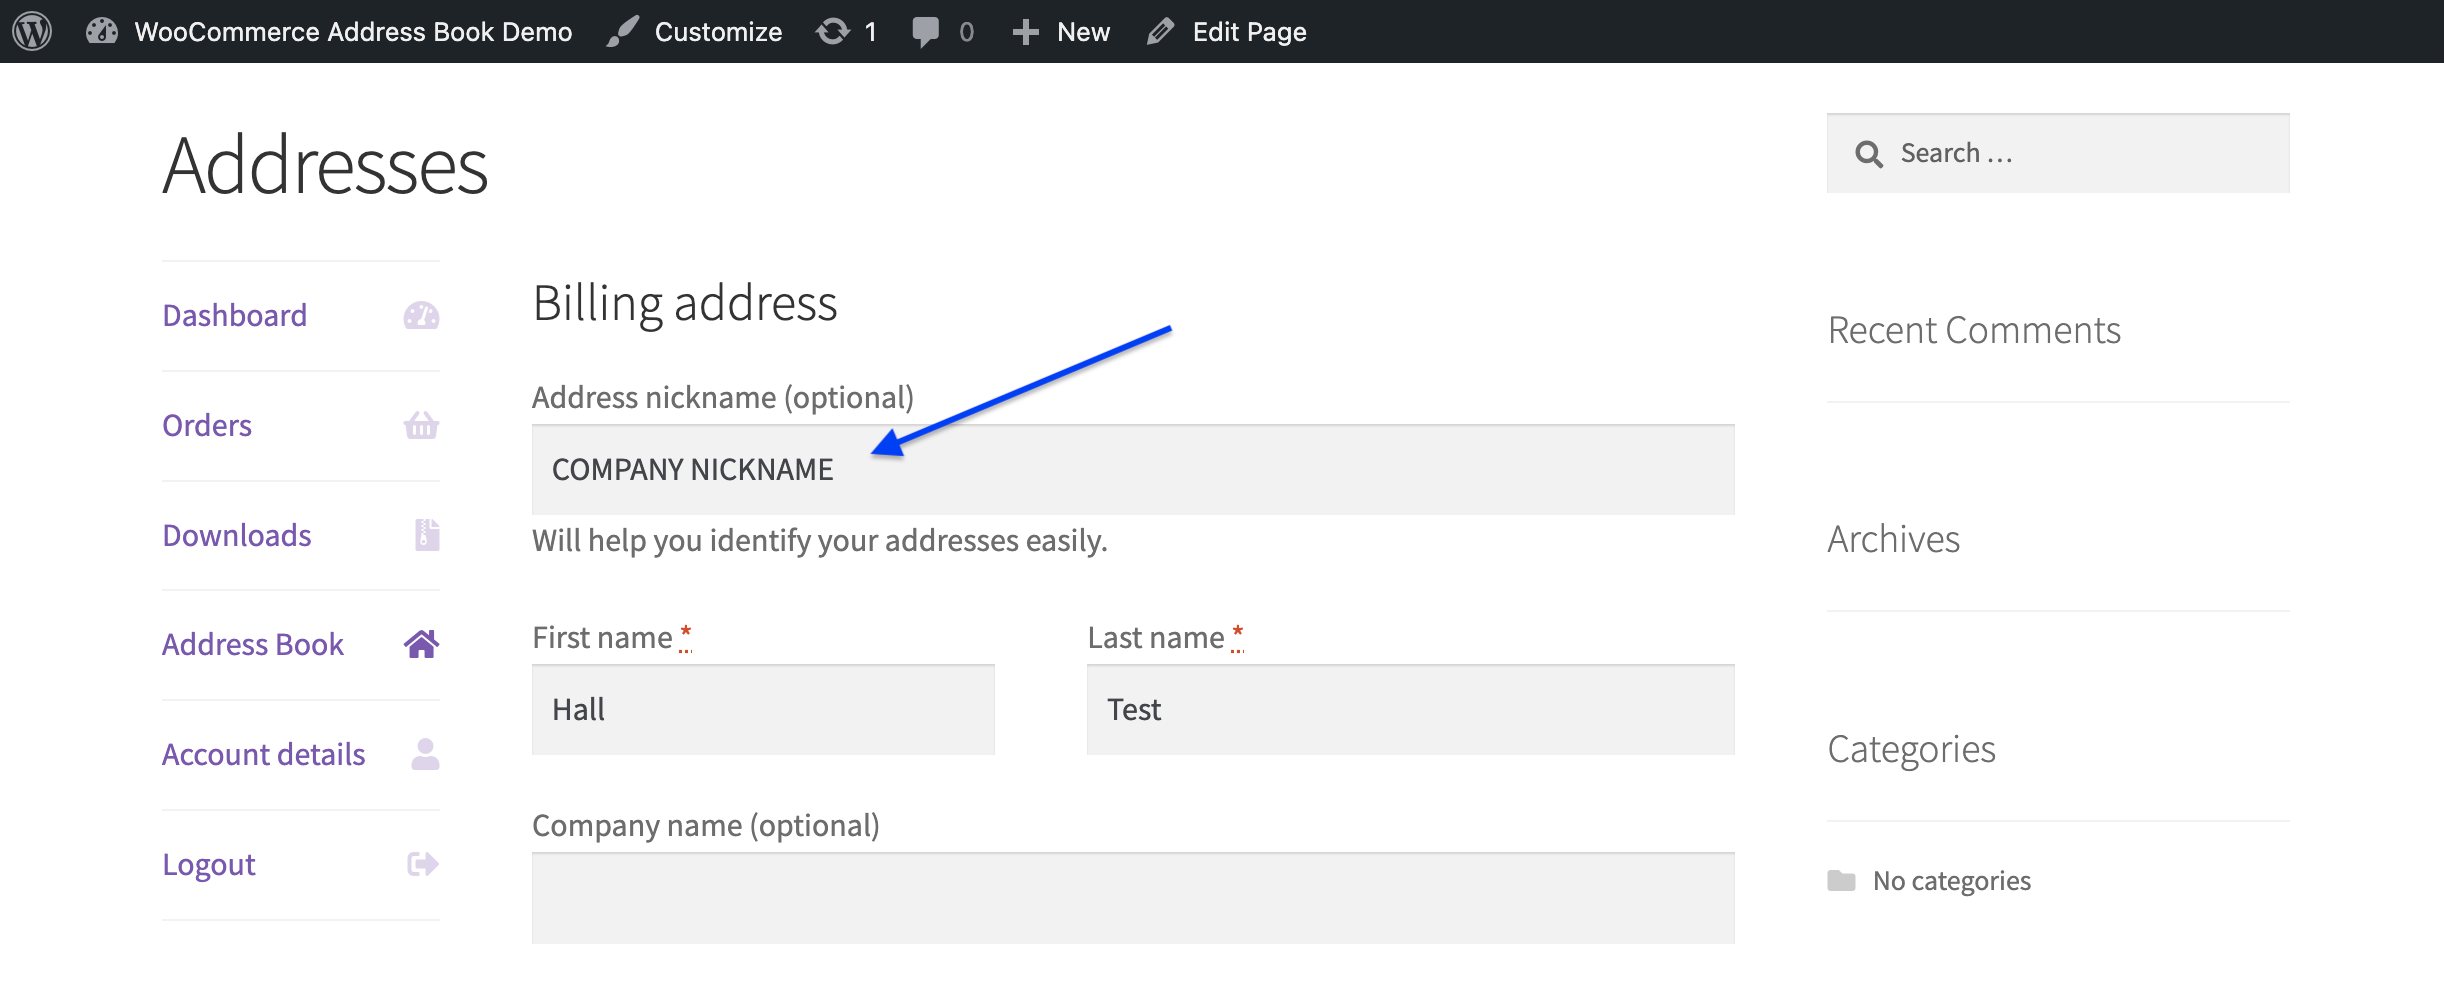
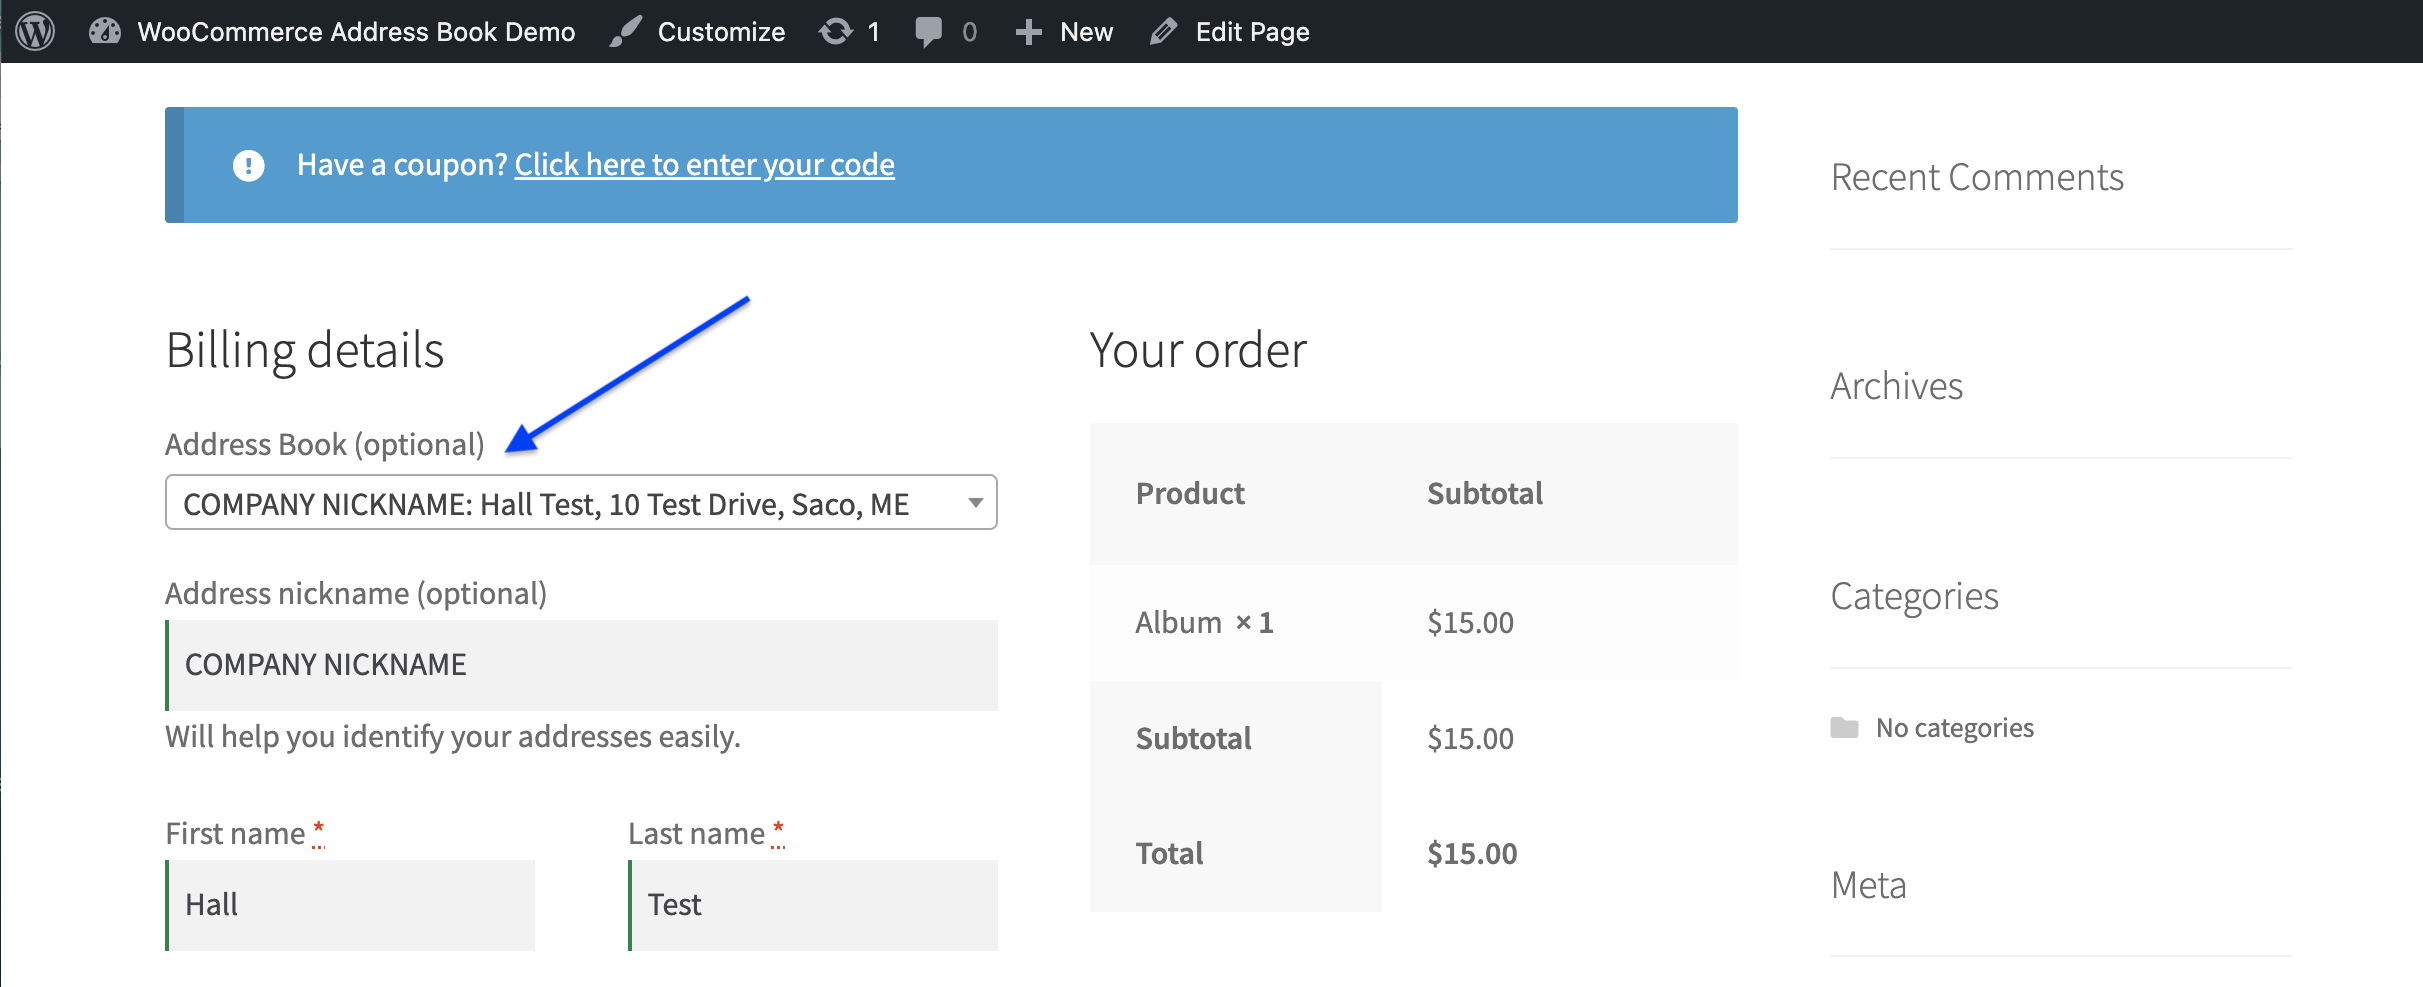
You can assign each address a nickname to make it easy to select them during checkout.
The nickname will appear in a dropdown menu at the top of the checkout page.
That’s it! Happy addressing.
If you have any questions about using this plugin, feel free to contact us.